Octopus can discover deployment targets during deployments using tags added to your Azure or AWS cloud resource templates. For Azure, Octopus uses tags added to your ARM templates. For AWS, Octopus uses tags added to your CloudFormation templates.
Target discovery takes place during deployment, and is useful when your deployment process creates your target cloud infrastructure before deploying software to it.
Cloud Target Discovery was introduced in Octopus 2022.2 for Azure Web Apps and ECS. EAP support for AKS clusters is provided via a feature toggle in Configuration ➜ Features.
Octopus 2022.3 will include EKS cluster support.
This page will walk you through the steps needed to enable cloud target discovery.
We recommend cloud target discovery over the existing dynamic infrastructure functionality.
Configure credentials for discovery
To perform discovery of targets from cloud resources, Octopus uses a well-known set of variables configured within your project to provide the credentials for authentication to the cloud provider. Variables can be scoped allowing for different credentials to be used when performing discovery as required (for example in different environments).
From Octopus 2022.3, you can configure the well-known variables used for target discovery when editing your deployment process in the Web Portal.
The variables used are different for each supported cloud provider.
Azure
To discover Azure cloud resources, Octopus uses the following variables:
| Name | Required | Description |
|---|---|---|
Octopus.Azure.Account | Y | An Azure account to use when discovering cloud targets |
From Octopus 2022.3, Azure steps that support target discovery will allow you to configure the variables above from within the step configuration if they have not been configured within your project yet.
- Open the deployment process and navigate to the Azure step.
- Expand the Cloud Connections section. If target discovery variables have not been configured, the Azure tile will say Configure.
- Click the Azure tile to open the Azure Cloud Connection drawer.
- Select the Azure Account to use.
- Click Ok. This will save the well-known variables above into your project.
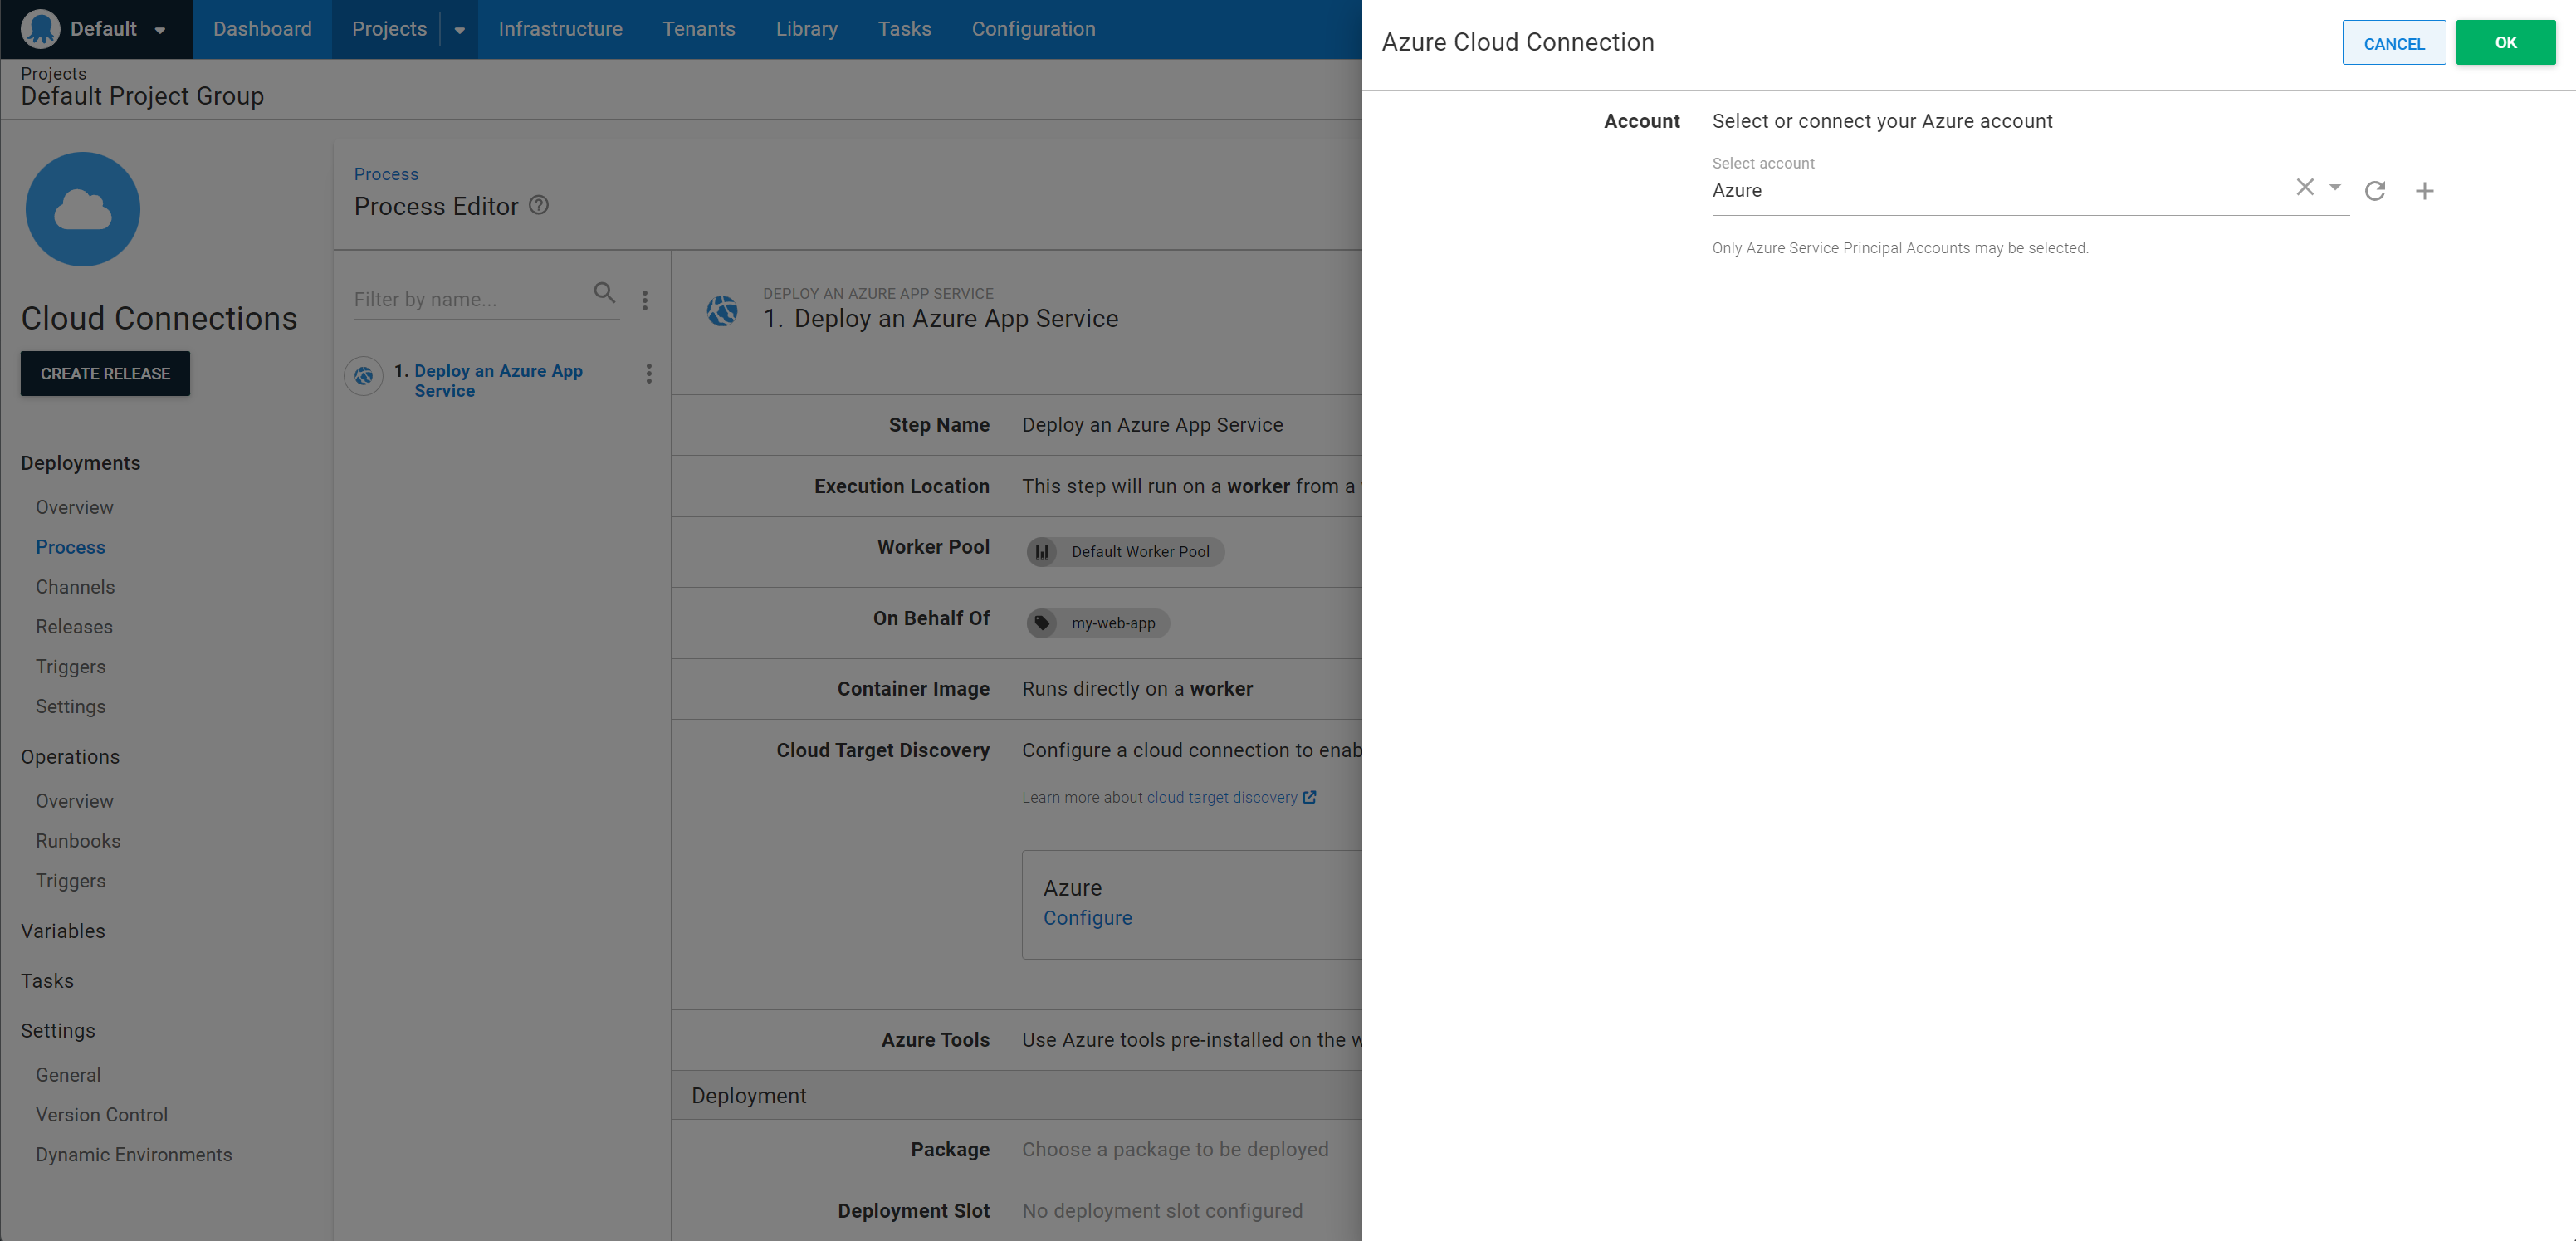
Once the variables for target discovery have been configured the Azure tile will say Cloud target discovery enabled and clicking the tile will redirect you to the Variables screen for the project where the target discovery variables can be edited if required.
AWS
To discover AWS cloud resources, Octopus uses the following variables:
| Name | Required | Description |
|---|---|---|
Octopus.Aws.Regions | Y | A comma separated list of AWS regions to perform target discovery in. |
Octopus.Aws.Account | N | An AWS account account to use when discovering cloud targets. If this is not set then credentials from the worker on which the step is run will be used. |
Octopus.Aws.WorkerPool | N | A worker pool to use when discovering cloud targets. If this is not set then the worker pool from the step will be used. If this is set any discovered targets will have this set as their worker pool. |
Octopus.Aws.AssumedRole.Arn | N | The ARN of an IAM role to assume during the discovery of targets. See Using IAM roles for more information on using and assuming roles. |
Octopus.Aws.AssumedRole.SessionName | N | The name of the session to use if assuming a role during discovery. If not set then an automatically generated name provided by AWS will be used. |
Octopus.Aws.AssumedRole.SessionDuration | N | The maximum duration the session will be available for if assuming a role during discovery. If not set then the default duration from the IAM role will be used. |
Octopus.Aws.AssumedRole.ExternalId | N | An external ID to use if assuming a role during discovery. See the AWS documentation for more information on the use of external IDs. |
From Octopus 2022.3, AWS steps that support target discovery will allow you to configure the variables above from within the step configuration if they have not been configured within your project yet:
- Open the deployment process and navigate to the AWS step
- Expand the Cloud Connections section. If target discovery variables have not been configured, the Amazon Web Services tile will say Configure.
- Click the Amazon Web Services tile to open the AWS Cloud Connection drawer.
- Choose the credentials to use for target discovery.
- Click Ok. This will save the well-known variables above into your project.
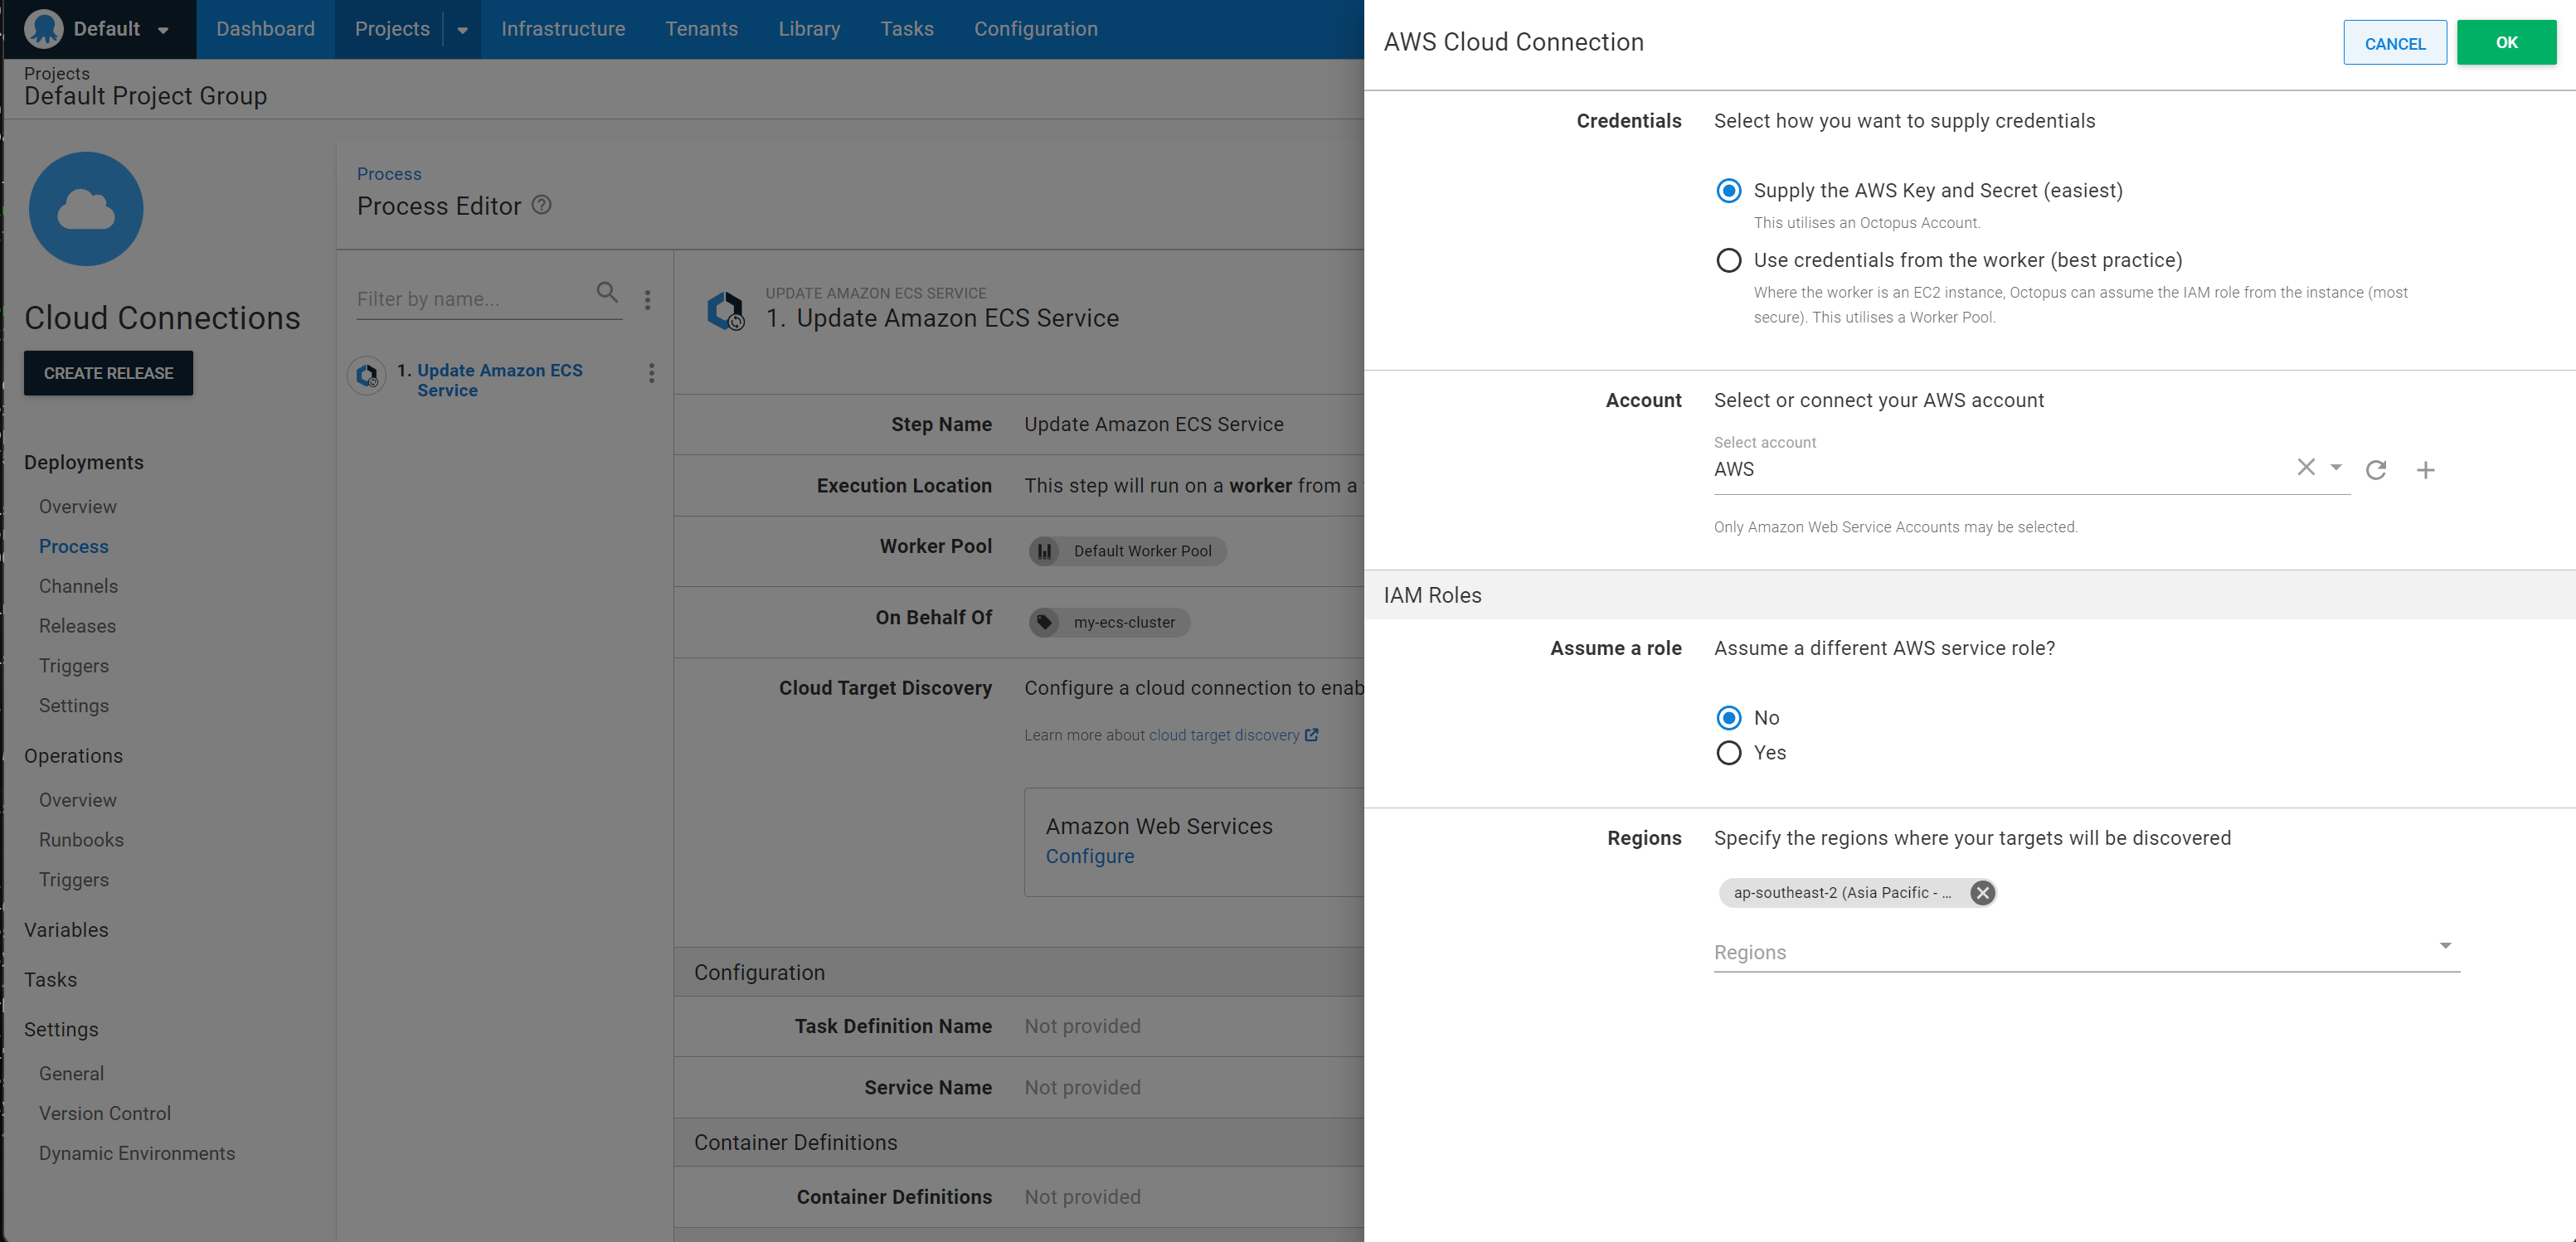
Once the variables for target discovery have been configured the Amazon Web Services tile will say Cloud target discovery enabled and clicking the tile will redirect you to the Variables screen for the project where the target discovery variables can be edited if required.
Tag cloud resources
Octopus looks for tags applied to cloud resources to discover and create deployment targets for you.
Tags in cloud resource templates are in the format octopus-{scope} and support the following for discovery. Note that only a single value is supported in tags at the moment.
| Tag | Required | Description | Example |
|---|---|---|---|
octopus-environment | Yes | The name of the environment the target can be used in during deployments. Only deployments matching the environment will discover the target. | octopus-environment = Development |
octopus-role | Yes | The target tag that should be applied to the target. Only deployments with a step that matches the target tag will discover the target. | octopus-role = PetShotFrontEnd |
octopus-space | No | The name of the space the target can be used in. If present only deployments within the matching space can discover the target. | octopus-space = PetShopTeam |
octopus-project | No | The name of the project the target will be discovered by. If present only deployments for the matching project can discover the target. | octopus-project = PetShop |
octopus-tenant | No | The name of the tenant the target can be discovered for. If present only deployments for the matching tenant will discover the target. | octopus-tenant = MyClient |
Add step to deployment process
Octopus will discover targets if one of the following steps are in your deployment process. Each step will discover targets that match it’s target tags.
- Deploy an Azure App Service
- Deploy an Azure Web App (Web Deploy)
- Deploy Amazon ECS Service
- Update Amazon ECS Service
- Kubernetes Steps:
- Deploy a Helm Chart
- Deploy Kubernetes YAML
- Run a kubectl script
- Configure and apply Kubernetes resources
- Configure and apply a Kubernetes ConfigMap
- Configure and apply a Kubernetes Ingress
- Configure and apply a Kubernetes Secret
- Configure and apply a Kubernetes Service
Enabling discovery for existing projects
Target discovery is enabled for all new projects and environments by default.
If you have an existing project or environment, enable it with the following steps.
Enable dynamic infrastructure
To discover targets for an environment, dynamic infrastructure needs to be enabled. To enable for an existing environment:
- Navigate to Infrastructure ➜ Environments.
- Click the overflow menu (
...) for the environment you want to enable or disable dynamic infrastructure on and select Edit. - Expand the Dynamic infrastructure section and tick the check-box to enable dynamic infrastructure.
- Click SAVE.
Enable deployments without a target
Using target discovery during a deployment means that there may be no existing targets at the start of a deployment. To allow deployments to start without any targets:
- Navigate to Projects ➜ Project name ➜ Deployments ➜ Settings.
- Expand the Deployment Targets Required and select the Allow deployments to be created when there are no deployment targets option.
- Click SAVE.
Discovering existing targets
Cloud Target Discovery will often discover resources which already have targets in Octopus. Here are some things to be aware of:
Previously discovered targets
If a target has been created via Cloud Target Discovery, the next time the same cloud resource is discovered, the target will simply be updated. Existing targets are matched by target name, which is formatted depending on the discovered resource. The names are chosen to be unique but as readable as possible.
- Azure Web App:
azure-web-app/{resource-group}/{web-app-name} - ECS Cluster:
{ecs-cluster-arn} - AKS Cluster:
aks/{subscription-id}/{resource-group}/{cluster-name} - EKS Cluster:
{eks-cluster-arn}
Renaming or moving cloud resources can cause target discovery to create duplicate targets. In most cases the old target will become unhealthy and be removed automatically by Octopus (see [Cleaning up unhealthy targets]) but in some cases the old target may still be healthy. In these cases, it must be removed manually.
Example: If you move an AKS Cluster to a different subscription and then update your Account in Octopus to use the new subscription ID, the old target will still pass its health-check. When discovery occurs a new target will be created (with the new Subscription ID in the target name) and the old target will need to be removed manually.
Overwriting manually added targets
Manually added targets can be overridden by Cloud Target Discovery but this will only happen if they match the name format above exactly. If they are different, a new target will be created.
We recommend not manually adding targets when using Cloud Target Discovery to avoid duplicate targets for a single cloud resource.
Cleaning up unhealthy targets
When targets are created via Cloud Target Discovery, they are monitored by Octopus. When the cloud resources are removed, Octopus will detect unhealthy targets and remove them periodically.
Octopus will not remove unhealthy targets immediately. Once a target is found to be unhealthy, Octopus will perform a health check once a minute. Targets will be removed if they fail five health checks in a row.
Examples
Azure Web App
Let’s say you have a project in Octopus called Pet Shop that deploys an application to an Azure Web App in a Development environment using the target tag PetShopFrontEnd and this web app is dynamically created as part of the deployment using an ARM template.
To use this web app previously in Octopus you might have either registered the target manually, or used a script step with custom code to try and find and create the web app target. In addition, previously when this web app was no longer needed you might have needed to either run a script or manually remove the target in Octopus.
By configuring a well-known variable and tagging your Azure Web App in your ARM template appropriately, Octopus can discover this target for you at deployment time. Additionally, Octopus will continue to monitor the target, and will remove it if it is removed in Azure.
- Configure an Azure account variable in your project named Octopus.Azure.Account, selecting an account that has permissions to be able to find the web app.
- Add tags to the web app resource within the ARM template to allow Octopus to discover it. For our example we can add the following tags to ensure that it is discovered correctly by our (and only by our project) using variable substitution:
"resources": [{
    "type": "Microsoft.Web/sites",
    //...otherProperties,
    "tags": {
        "octopus-environment": "#{Octopus.Environment.Name}",
        "octopus-role": "PetShopFrontEnd",
        "octopus-project": "#{Octopus.Project.Name}"
    }
}]
Octopus will now discover the web app as a target before deploying to it, matching the environment, target tag, and project from the deployment to the tags created within the ARM template, without any custom scripts or manual registration! Octopus will also remove this target if it is later removed from Azure.
Amazon ECS
Let’s say you have a project in Octopus called Pet Shop that deploys an application to an Amazon ECS Cluster in a Development environment using a target tag of PetShopFrontEnd and the cluster is dynamically created as part of the deployment using a CloudFormation template.
To use this cluster previously in Octopus you might have either registered the target manually, or used a script step with custom code to try and find and create the cluster target. In addition, previously when this cluster was no longer needed you might have needed to either run a script or manually remove the target in Octopus.
By configuring some well-known variables and tagging your ECS cluster in your CloudFormation template appropriately, Octopus can discover this target for you at deployment time. Additionally, Octopus will continue to monitor the target, and will remove it if it is removed in AWS.
- Set the credentials to use during discovery by
- Configuring an AWS account variable in your project named Octopus.Aws.Account, selecting an account that has permissions to be able to find the cluster. If not configured the credentials from the worker set on the deployment step will be used.
- Optionally configuring a worker pool variable in your project named Octopus.Aws.WorkerPool if discovery should be executed in a specific worker pool.
- Optionally configuring discovery to use an assumed role by setting a variable in your project named Octopus.Aws.AssumedRole.Arn as well as other variables to configure the session name, duration and external id if required.
- Configure which AWS region to search for your ECS cluster in by setting a variable in your project named Octopus.Aws.Regions.
- Add tags to the ECS cluster resource within the CloudFormation template to allow Octopus to discover it. For our example we can add the following tags to ensure that it is discovered correctly by our project (and only by our project) using variable substitution:
{
  "Type": "AWS::ECS::Cluster",
  "Properties": {
    //...otherProperties
    "Tags": [
      {
        "Key": "octopus-environment",
        "Value": "#{Octopus.Environment.Name}"
      },
      {
        "Key": "octopus-role",
        "Value": "PetShopFrontEnd"
      },
      {
        "Key": "octopus-project",
        "Value": "#{Octopus.Project.Name}"
      }
    ]
  }
}
Octopus will now discover the ECS cluster as a target before deploying to it, matching the environment, target tag, and project from the deployment to the tags created with the CloudFormation template, without any custom scripts or manual registration! Octopus will also remove this target if it is later removed from AWS.
Help us continuously improve
Please let us know if you have any feedback about this page.
Page updated on Tuesday, April 30, 2024