The custom installation directory feature is one of the configuration features you can enable as you define the steps in your deployment process.
You can specify a custom installation directory for package and IIS steps. The custom installation directory feature deploys your package to a specified location on the target server. This feature helps when you are using an application that requires your files be in specific locations, such as many Content Management Systems (CMS).
Only use the custom installation directory feature when you really need it.
The standard convention for deploying packages is often the best and simplest way to deploy your packages, and it eliminates problems caused by file locks and stale files being left in the deployment folder. It also provides smoother deployments and less downtime for Windows Services and Web Applications, so before you configure a custom installation directory, review the package deployment convention and package deployment feature ordering to be certain that you really need to configure a custom installation directory.
Add a custom installation directory
- From your Package Deploy or IIS step, click the Configure Features link.
- Check the Custom Installation Directory check-box and click Ok.
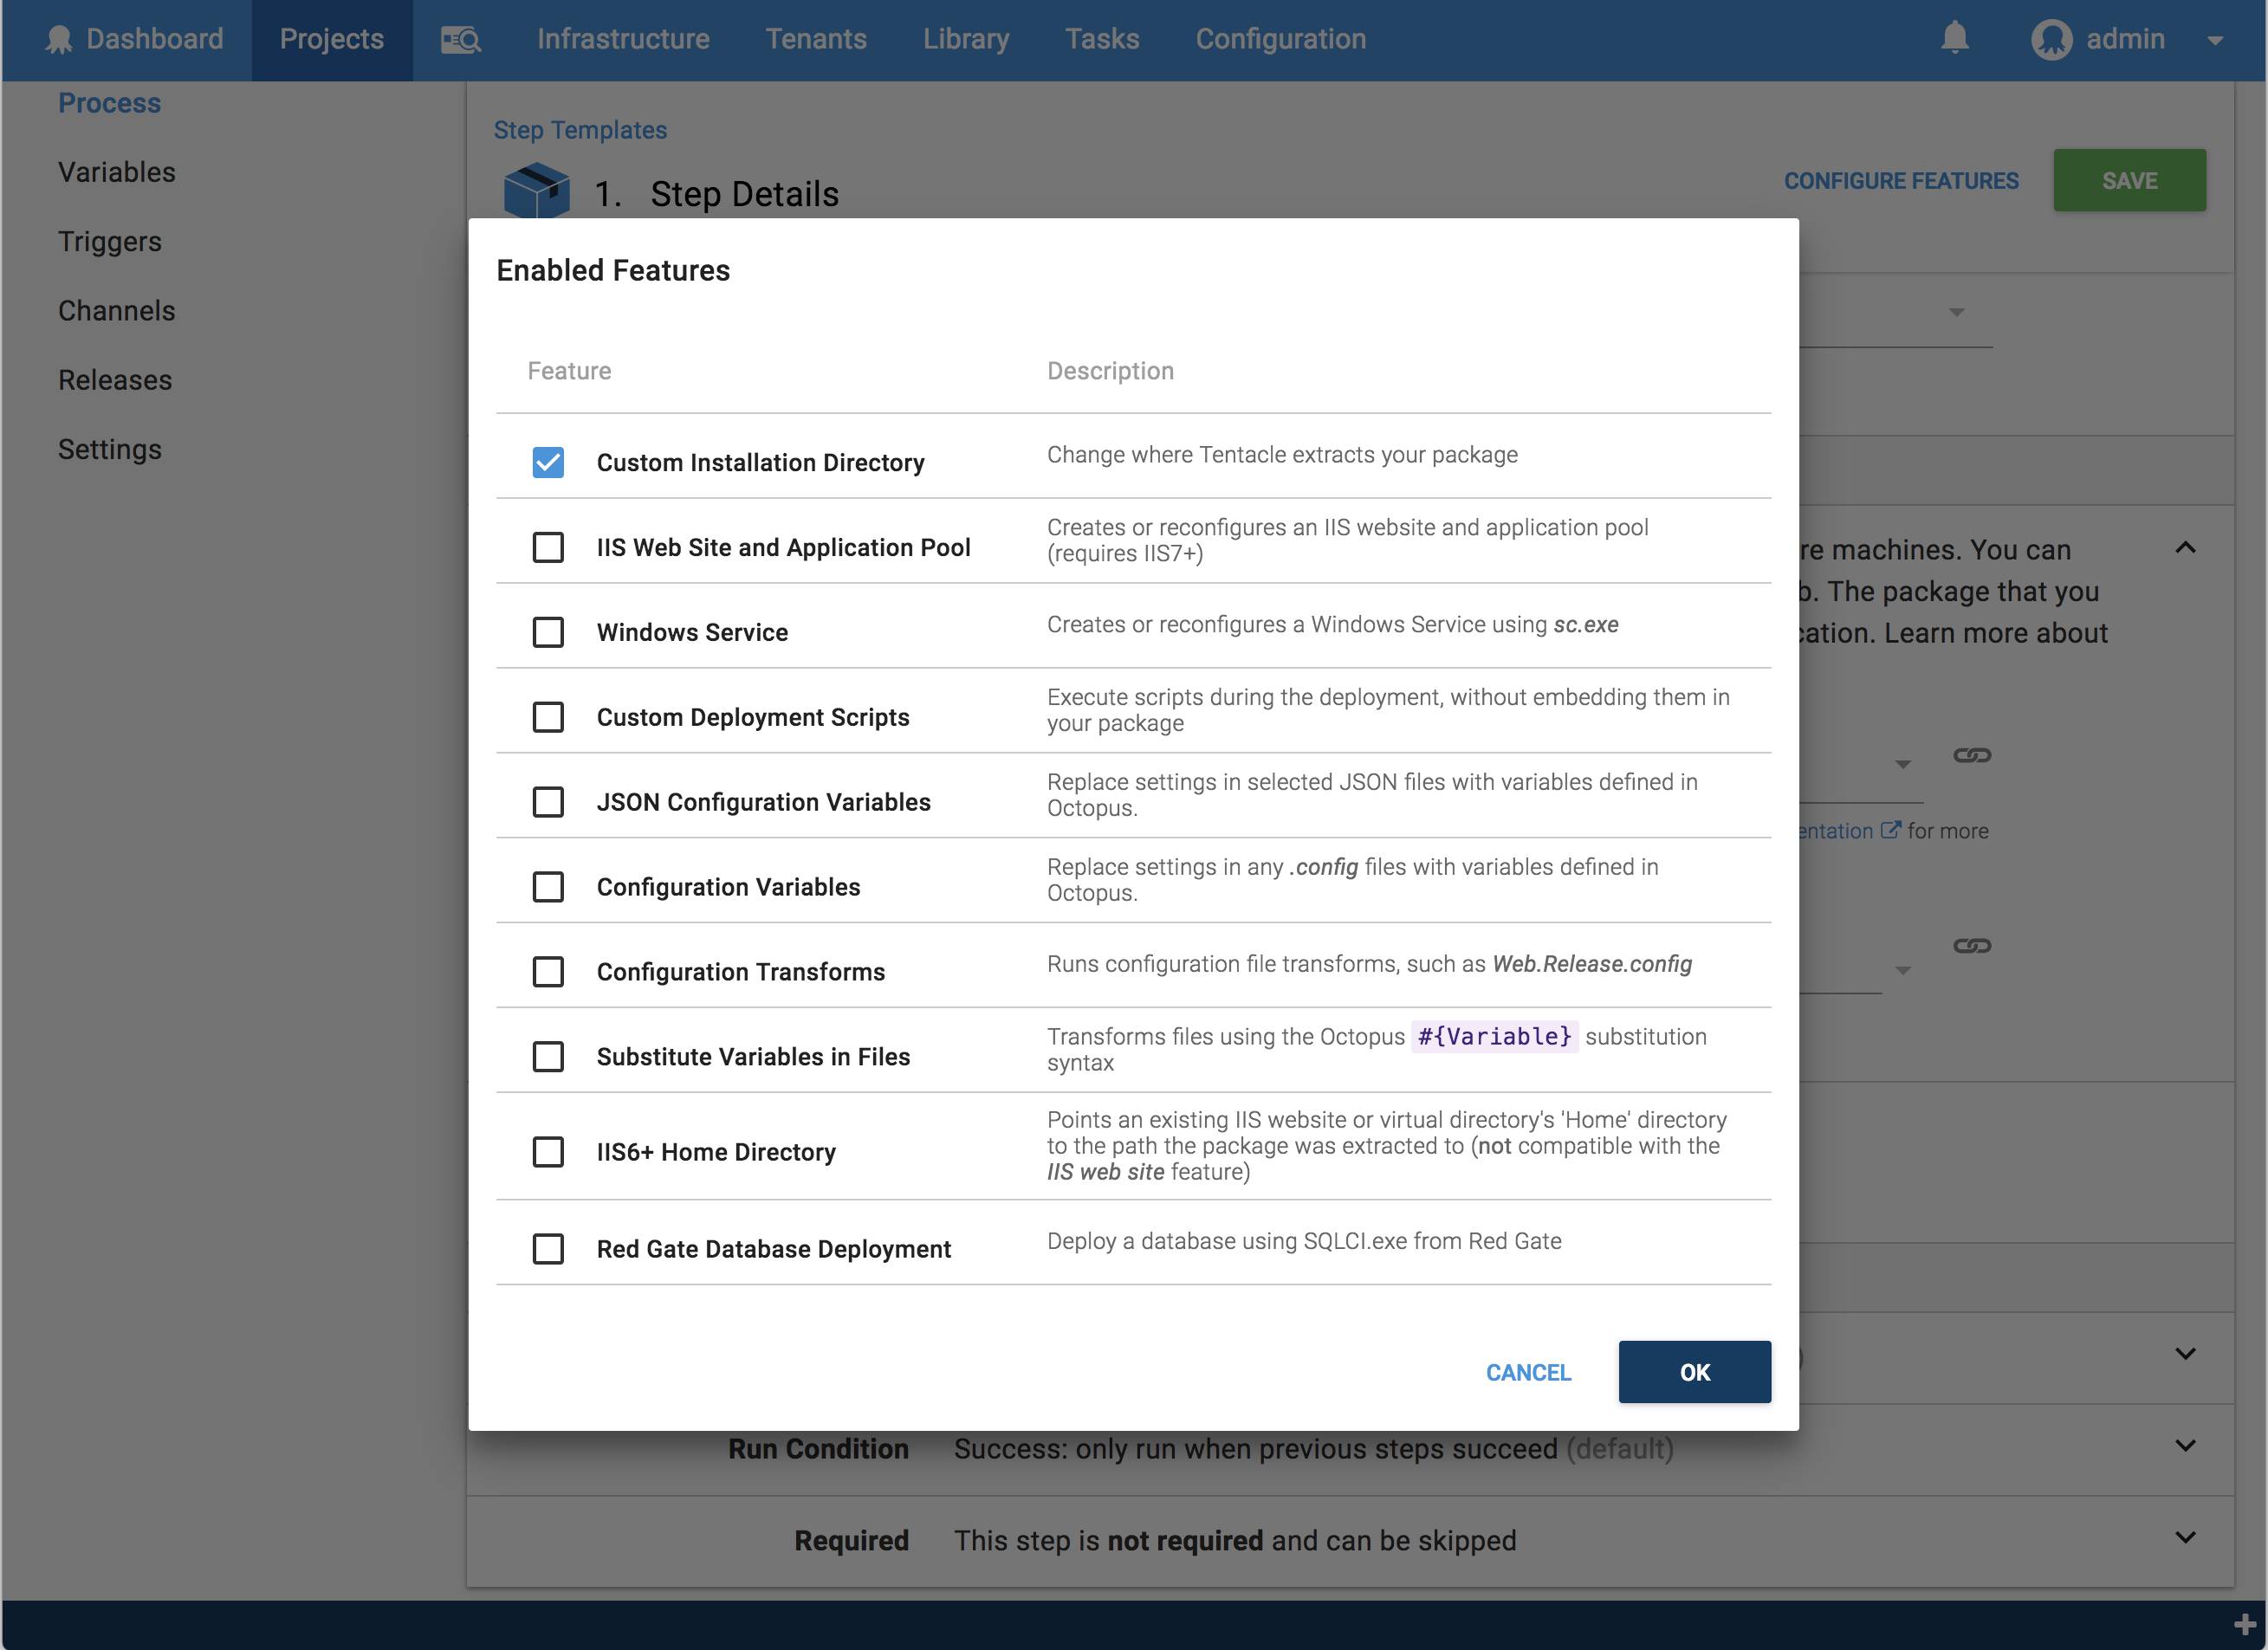
When you return to your deployment process, you will see the Custom Install Directory option has been added to the Features section of the deployment process.
- Add the step details:
- Enter a name for the step.
- Select the targets where the step should run.
- Select the package feed where the package will be available.
- Enter the package ID for the package to be deployed.
- Enter the path for the custom installation directory, or you can insert a variable if you have defined the path as a variable.
Defining a variable with the directory path, means you can scope different values to different environments. For instance:
| Variable Name | Value | Scope |
|---|---|---|
| CustomInstallDirectory | \path\to\test\directory\ | Test |
| CustomInstallDirectory | \path\to\production\directory\ | Production |
Read more about variables.
- If you would like to remove existing files from the custom installation directory before your deployed files are copied to it, check the Purge check-box.
- If there are files you would like to exclude from the purge, add the files and directories you want to keep to the Exclude from purge list.
The Exclude from purge list must be a newline-separated list of file or directory names, relative to the installation directory. To exclude an entire directory specify it by name without a wildcard. Extended wildcard syntax is supported. For instance:
appsettings.config
Config
Config\*.config
**\*.config- Add any conditions you need to specify for the step, and then click SAVE.
This will save and display the step you’ve just created. From here you can use the project overview menu to continue defining your deployment process, or click CREATE RELEASE to create a release and deploy your application.
Packages deployed to a custom installation directory are deployed in the same way as other package deploy steps. Read about how packages are deployed for more information.
Help us continuously improve
Please let us know if you have any feedback about this page.
Page updated on Sunday, January 1, 2023