We are commonly asked how to deploy and configure HTML/JS or Single Page Applications (SPA) running in a browser, or JavaScript applications running in Node.js. This guide provides a simple example of deploying and configuring a simple JavaScript application using AngularJS.
Not using AngularJS? This example uses AngularJS but the same basic principles apply for any applications running in a browser or Node.js. Instead of using AngularJS constants, you could provide globally accessible values, or alternatively provide the configuration values in a separate JavaScript file your application loads as a module. The important part to understand is how to get your Octopus Variables into your application.
Prerequisites
This guide assumes some familiarity with common Octopus concepts like configuring projects and variables. To deploy this package using this guide you will need a server with IIS installed since it uses the IIS Websites and Application Pools deployment steps. Alternatively you could use any other web host, like Express in Node.js, since this is just a single HTML file with no other dependencies.
Sample application
Here is a very simple AngularJS application which uses AngularJS Constants to provide other services, controllers and directives with access to the configuration data stored in Octopus. The important part to note here is where we set the constant: we are going to use the Substitute Variables in Templates feature to replace the #{MyApp.ConfigValue1} expression at deployment time.
MyApp.html
<!DOCTYPE html>
<html>
<script src="https://ajax.googleapis.com/ajax/libs/angularjs/1.5.7/angular.min.js"></script>
<body>
<script type="text/javascript">
angular
    .module('myApp', [])
	// Create a constant JSON object called 'myConfig' which can be injected
    .constant("myConfig", {
        "configValue1": "#{MyApp.ConfigValue1}",
        "configValue2": "#{MyApp.ConfigValue2}"
    })
    // Now we can provide configuration by injecting myConfig into this controller
    .controller("myCtrl", function($scope, myConfig) {
		$scope.message = "Hello world!";
		$scope.myConfig = myConfig;
    })
</script>
<div ng-app="myApp" ng-controller="myCtrl">
  <h1>{{message}}</h1>
  <p><em>These configuration values were set by Octopus Deploy:</em></p>
  <p>ConfigValue1: {{myConfig.configValue1}}</p>
  <p>ConfigValue2: {{myConfig.configValue2}}</p>
</div>
</body>
</html>
Step 1: Upload the package to the built-in repository
Firstly we need to make the package available for Octopus to deploy.
We’ve crafted and packaged v1.0.0 of this sample application for you to try out (see the link below). Alternatively you can create your own application and package the application yourself to try it out.
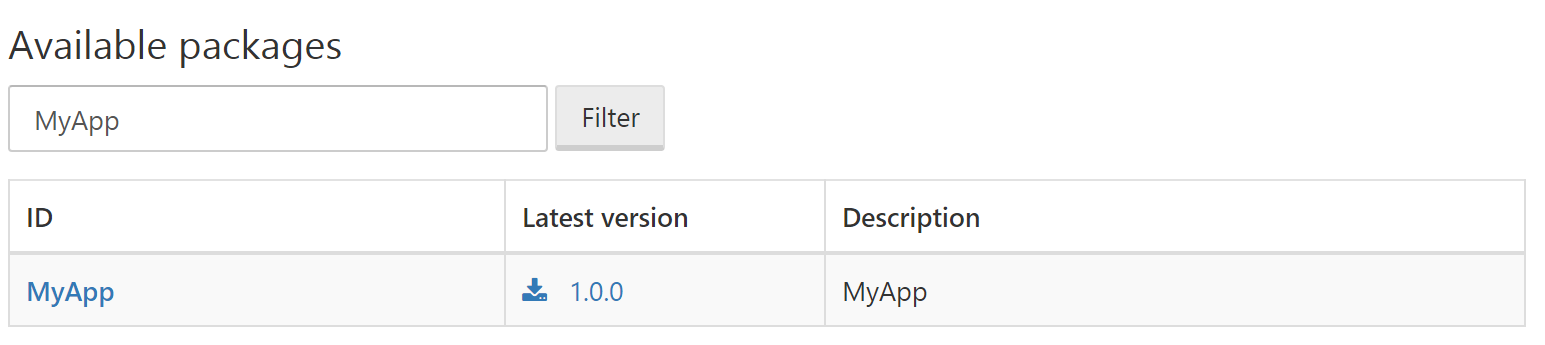
- Download MyApp.1.0.0.zip.
- Upload it to the Octopus Built-In. repository (you can do this by going to {{Library,Packages}} and clicking the Upload package button).
Step 2: Create the project, variables and deployment process
Now we need to create the project and configure it ready to deploy our JavaScript application.
- Create a new Project and choose an appropriate Lifecycle for testing this sample application.
- Remember you need to target a web server running IIS in order to follow this guide verbatim.
- Configure some project variables to match the JavaScript shown above. You can use these values or any other values you wish - we’ve chosen to show a complex expression including an Octopus System Variable.

- Configure the deployment process to deploy the MyApp package and host it in an IIS Web Site. Our web servers in this example belong to the web-server role.
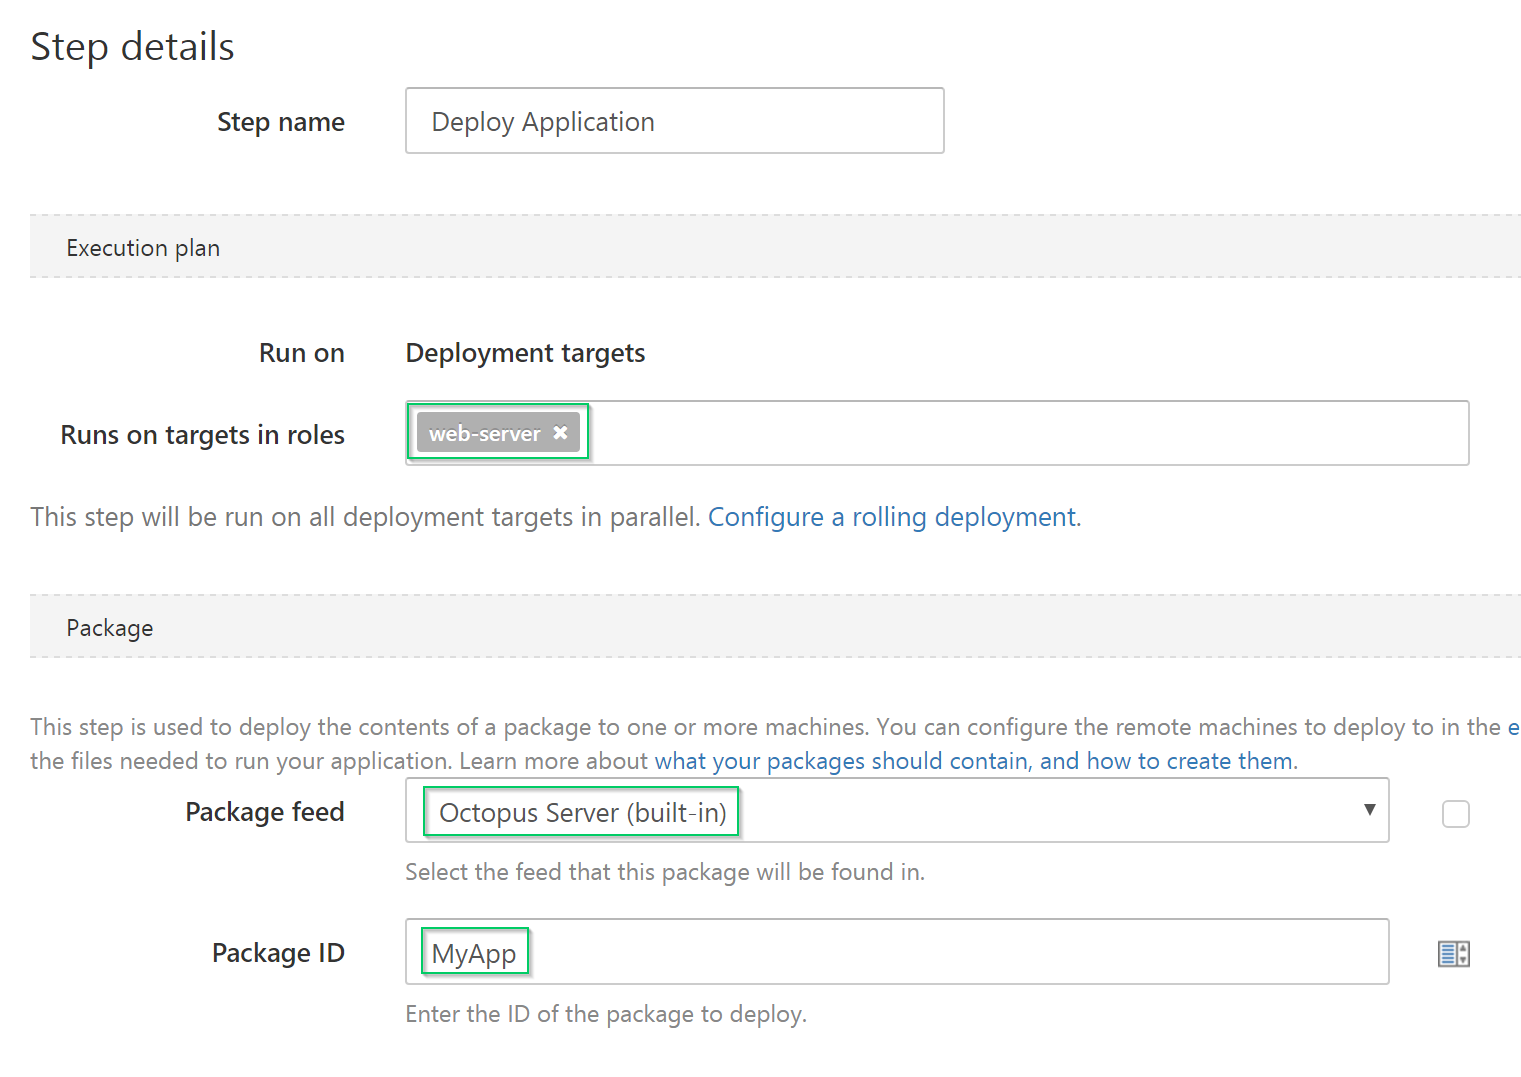
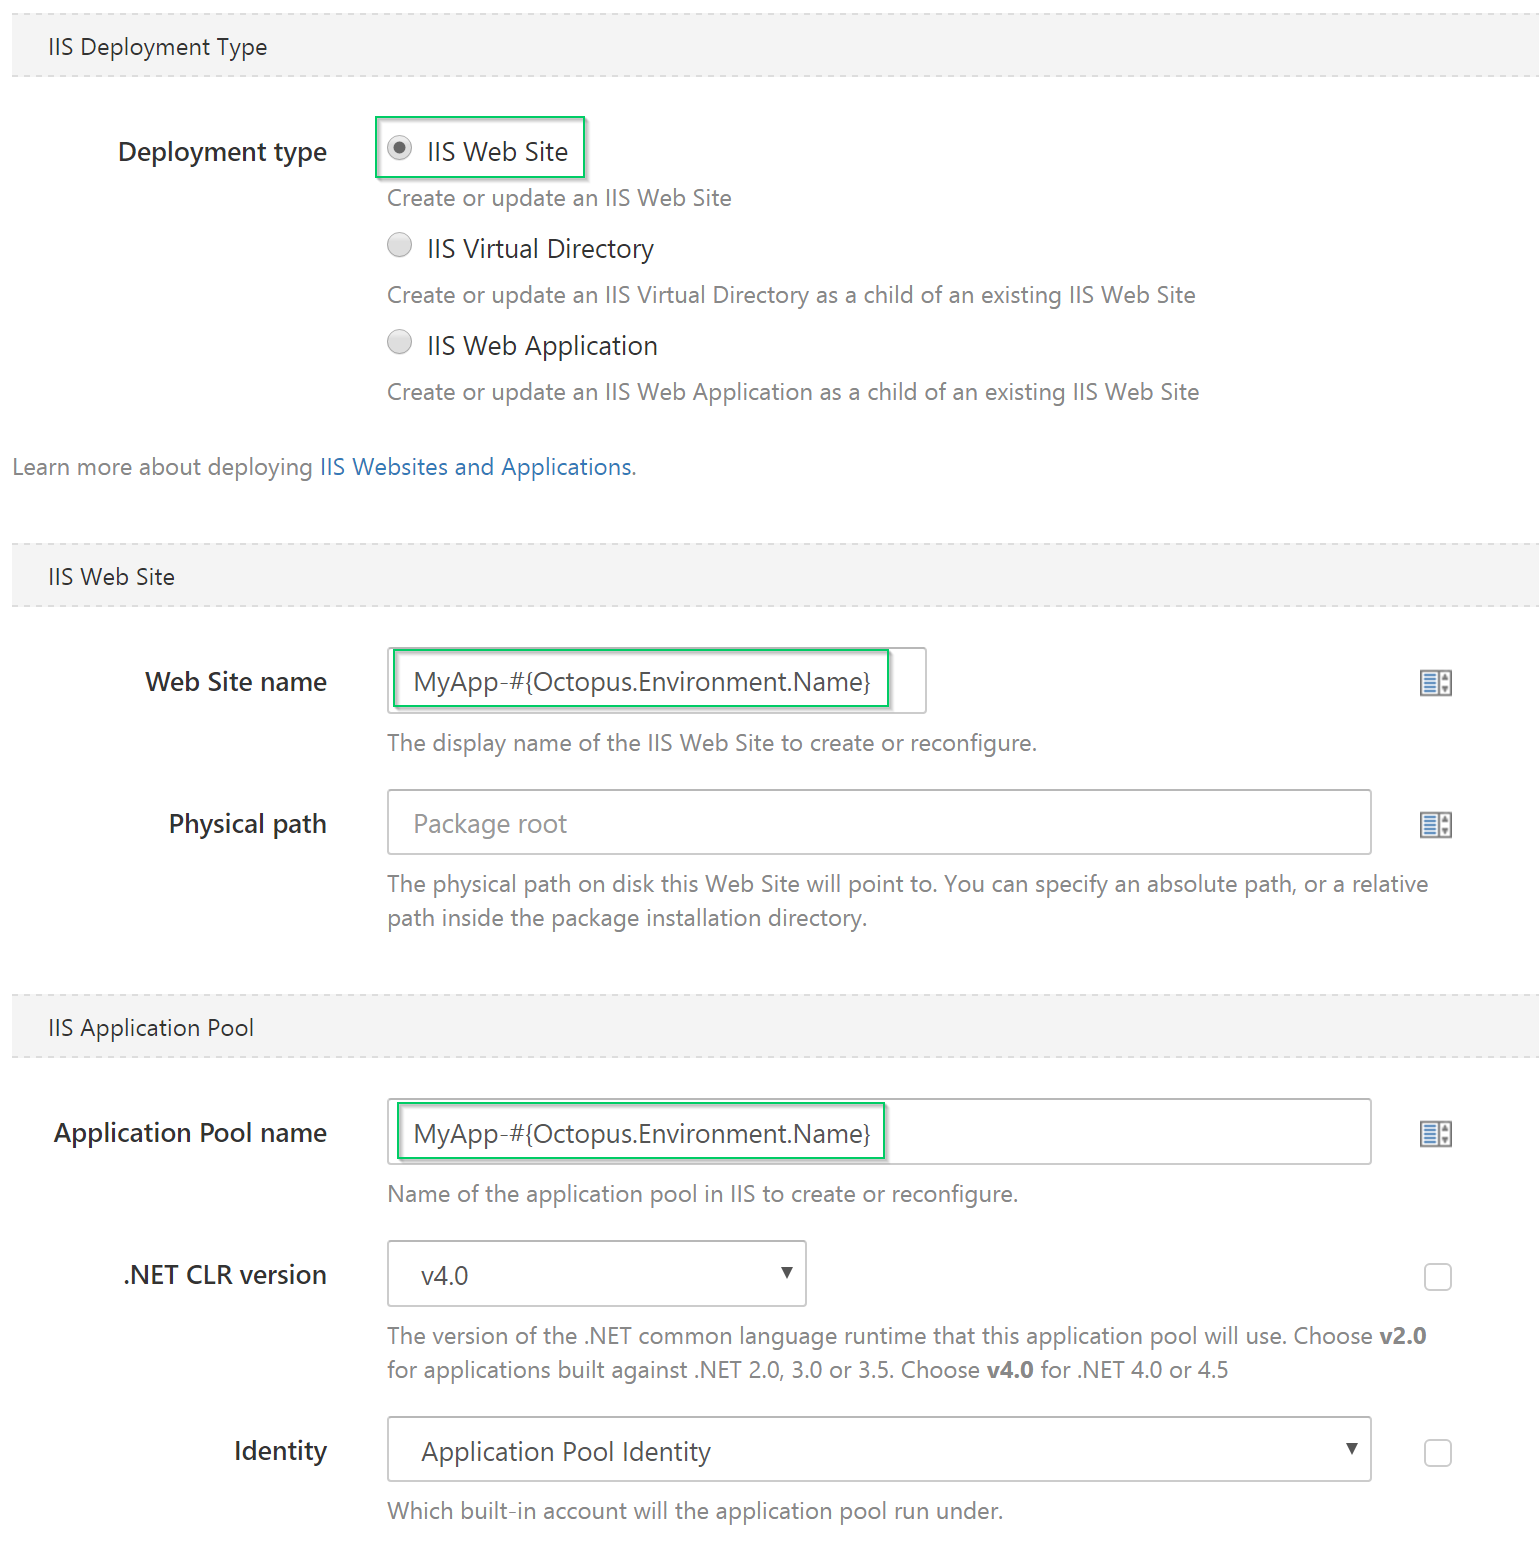
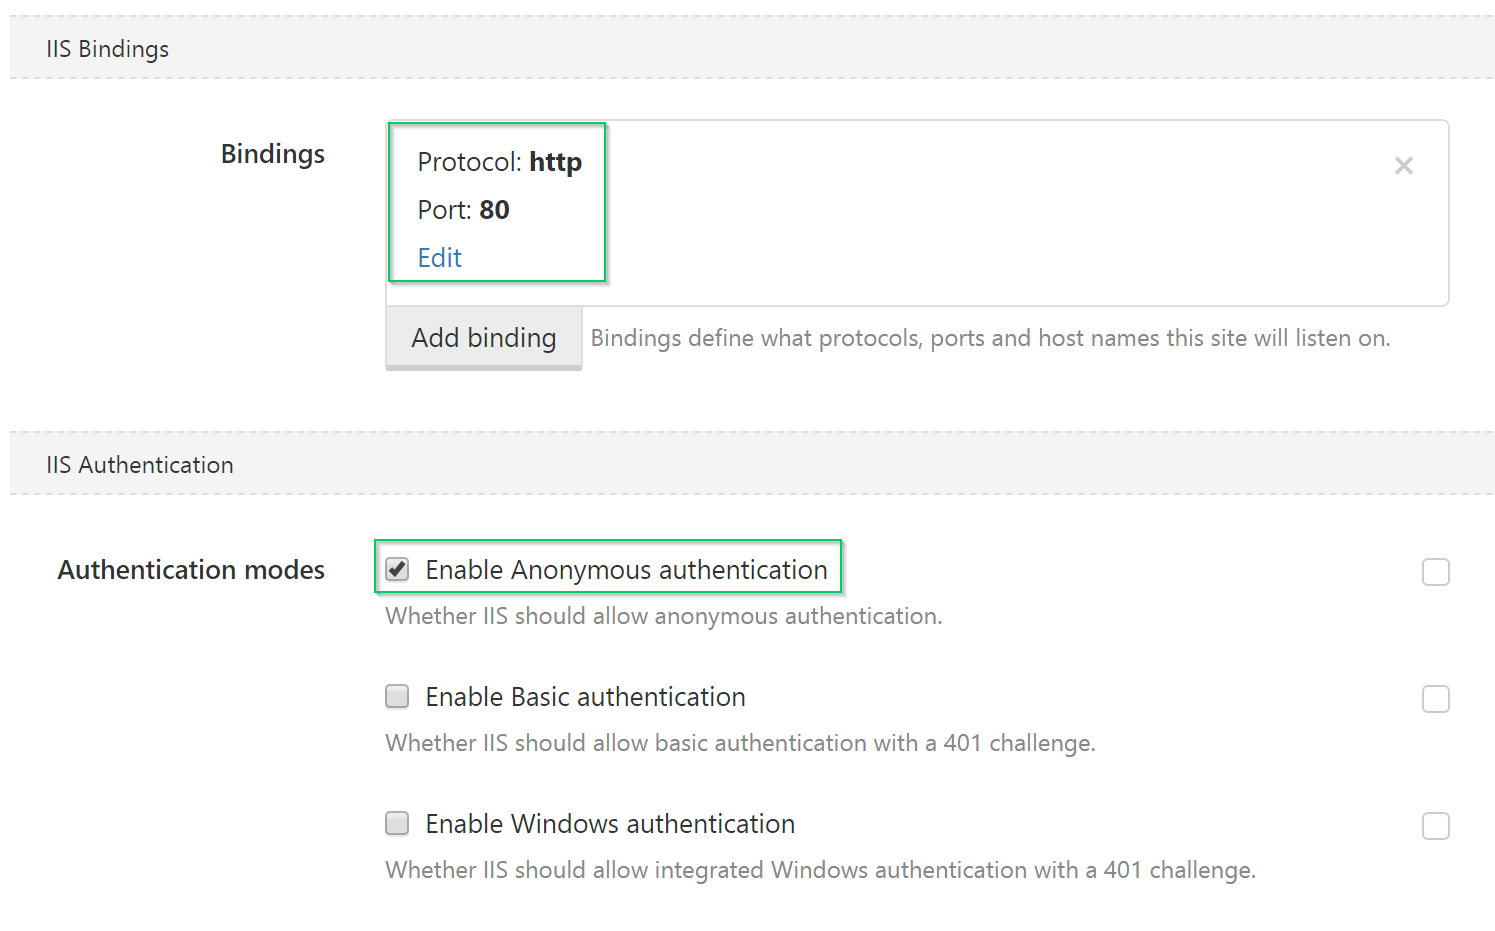
- Configure the IIS Web Site you want Octopus to set up on your behalf.
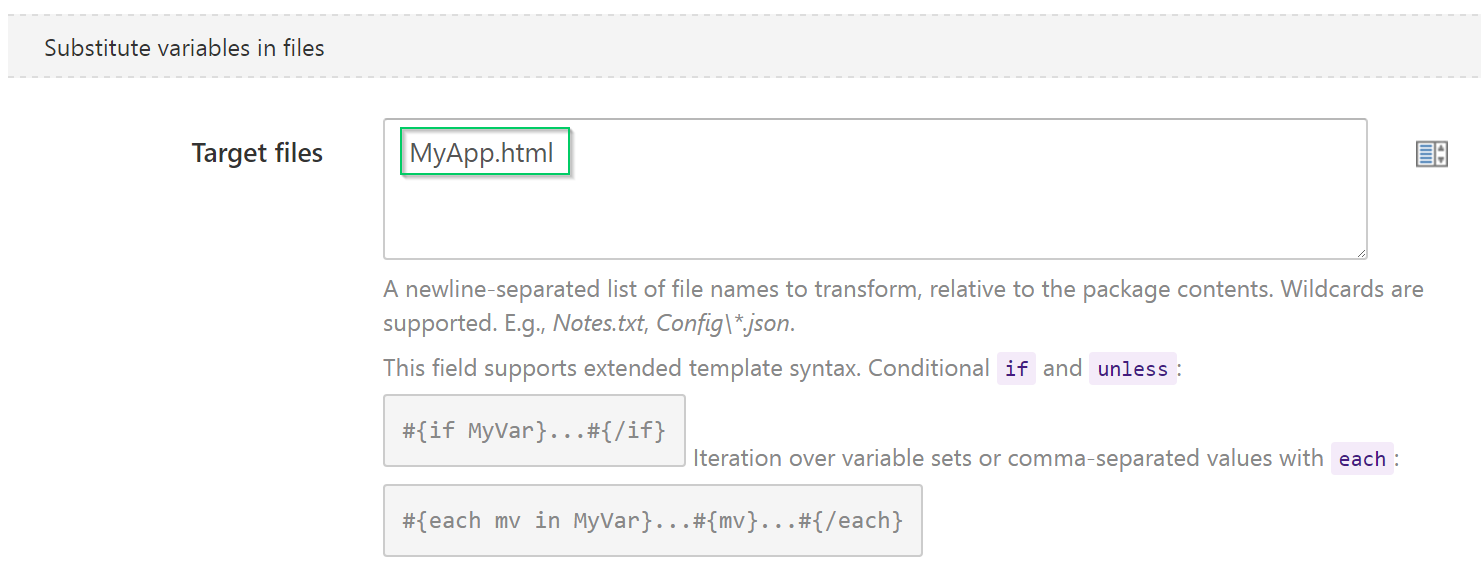
- Enable the Substitute Variables in Templates feature and configure it to replace the expressions in our
MyApp.htmlfile with variable values we defined earlier.
Step 3: Deploy
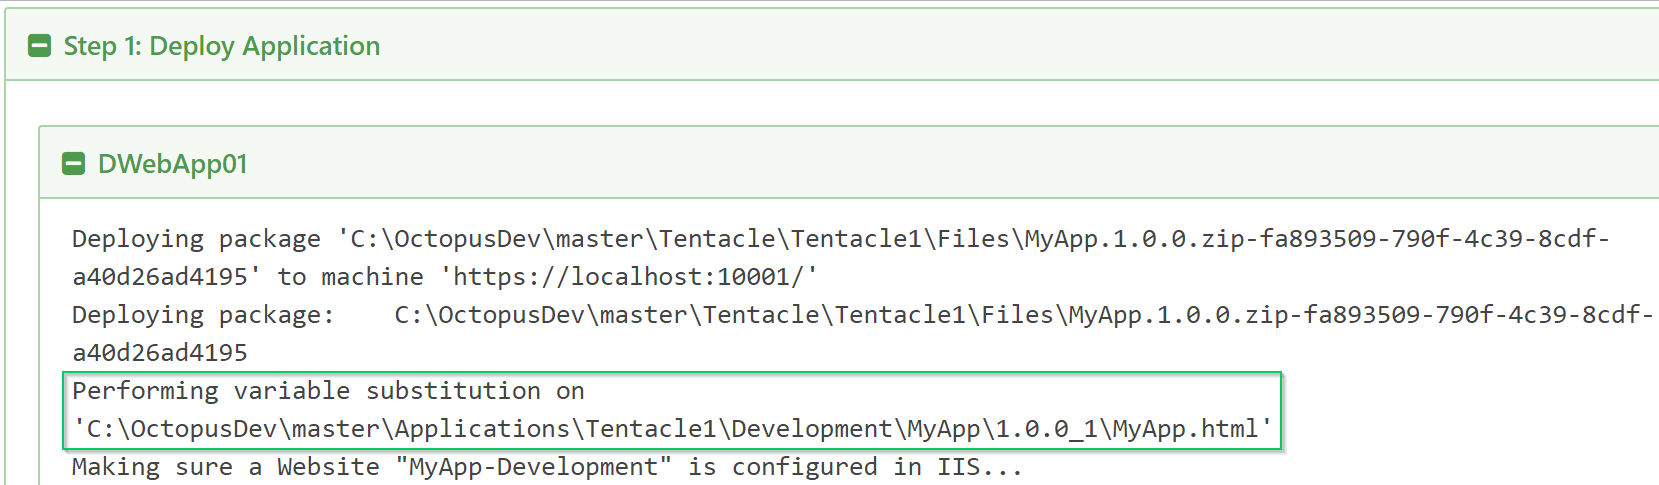
Now when we create a release for this project and deploy it we can see that Octopus has found the MyApp.html file and substituted the variable values into our expressions.
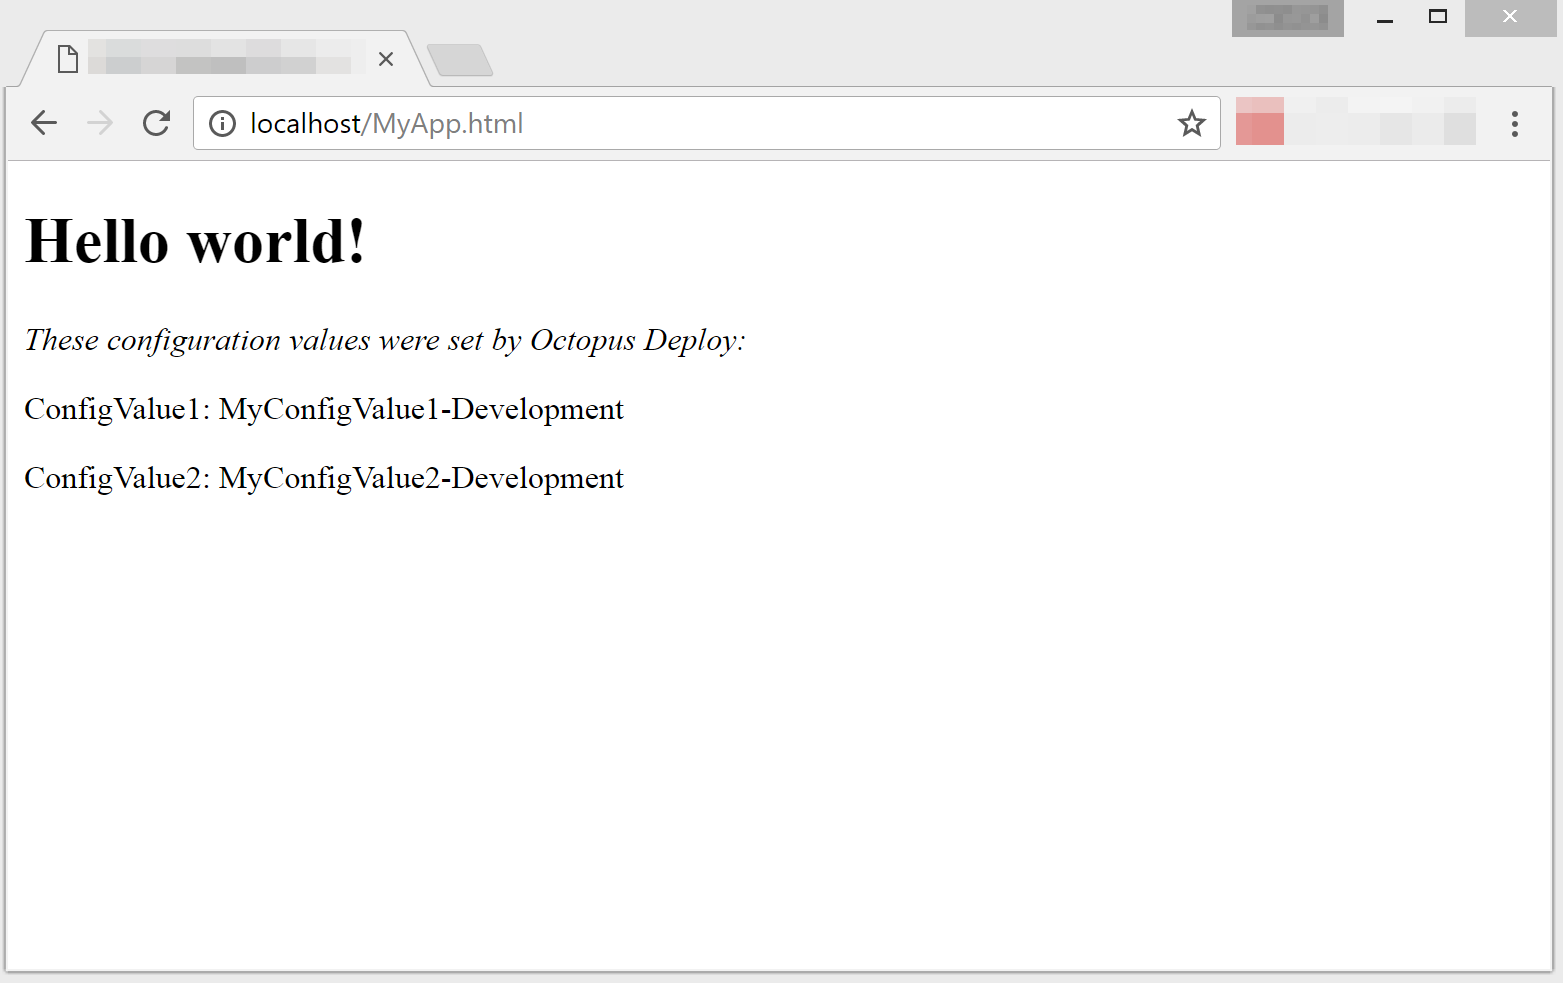
And finally when we load the application in our browser we can see the results have flowed all the way through from Octopus to first-class citizens in our AngularJS application!
Step 4: Minify the JavaScript and deploy again
This approach also works perfectly with minified sources. This is because the minifier won’t change string literals like "#{MyApp.ConfigValue1}" and the substitution will work just like it did before. In this example we will just minify the JavaScript inline in the HTML file. You can get the same result by moving the JavaScript into an external file and minifying that.
- Unpack the MyApp.1.0.0.zip file.
- Minify the contents of the
<script>tag. We used https://jscompress.com/ to minify the JavaScript. - You should notice the
"#{MyApp.ConfigValue1}"string literal has been left intact by the minifier. - Pack the HTML file into a new package and name the file MyApp.1.0.1.zip. This new version of our package has been enhanced with minified sources and will be much faster to download!
- Push the new package into the built-in repository, create a new release and deploy that release. You should see the same result as before, but now with minified sources!
MyApp.html with minified JavaScript
<!DOCTYPE html>
<html>
<script src="https://ajax.googleapis.com/ajax/libs/angularjs/1.5.7/angular.min.js"></script>
<body>
<script type="text/javascript">
angular.module("myApp",[]).constant("myConfig",{configValue1:"#{MyApp.ConfigValue1}",configValue2:"#{MyApp.ConfigValue2}"}).controller("myCtrl",function(a,b){a.message="Hello world!",a.myConfig=b});
</script>
<div ng-app="myApp" ng-controller="myCtrl">
  <h1>{{message}}</h1>
  <p><em>These configuration values were set by Octopus Deploy:</em></p>
  <p>ConfigValue1: {{myConfig.configValue1}}</p>
  <p>ConfigValue2: {{myConfig.configValue2}}</p>
</div>
</body>
</html>
Next steps
From this point you could build on this example, pushing configuration variables through from Octopus to your application. You may want to consider how granular you make each constant, perhaps combining related configuration data into the same JSON object.
Help us continuously improve
Please let us know if you have any feedback about this page.
Page updated on Sunday, January 1, 2023