👋 Welcome to Octopus Deploy!
This tutorial will help you complete your first deployment to Kubernetes with Octopus Deploy. We’ll walk you through the steps to deploy YAML files to your Kubernetes cluster.
Before you start
To follow this tutorial, you need:
- Octopus Cloud instance
- Kubernetes cluster
- Docker Hub account
- GitHub account
GitHub repository
To start quickly, you can fork our sample GitHub repository, which includes pre-created YAML files. Follow the steps below to fork the repository:
- Navigate to the OctoPetShop repository.

- In the top-right corner of the page, click FORK.
- Provide an Owner and repository name, for example
OctoPetShop. - Keep the Copy the master branch only checkbox selected.
- Click CREATE FORK.
- Wait for the process to complete (this should only take a few seconds).
Now you’re ready, let’s begin deploying your first application to Kubernetes.
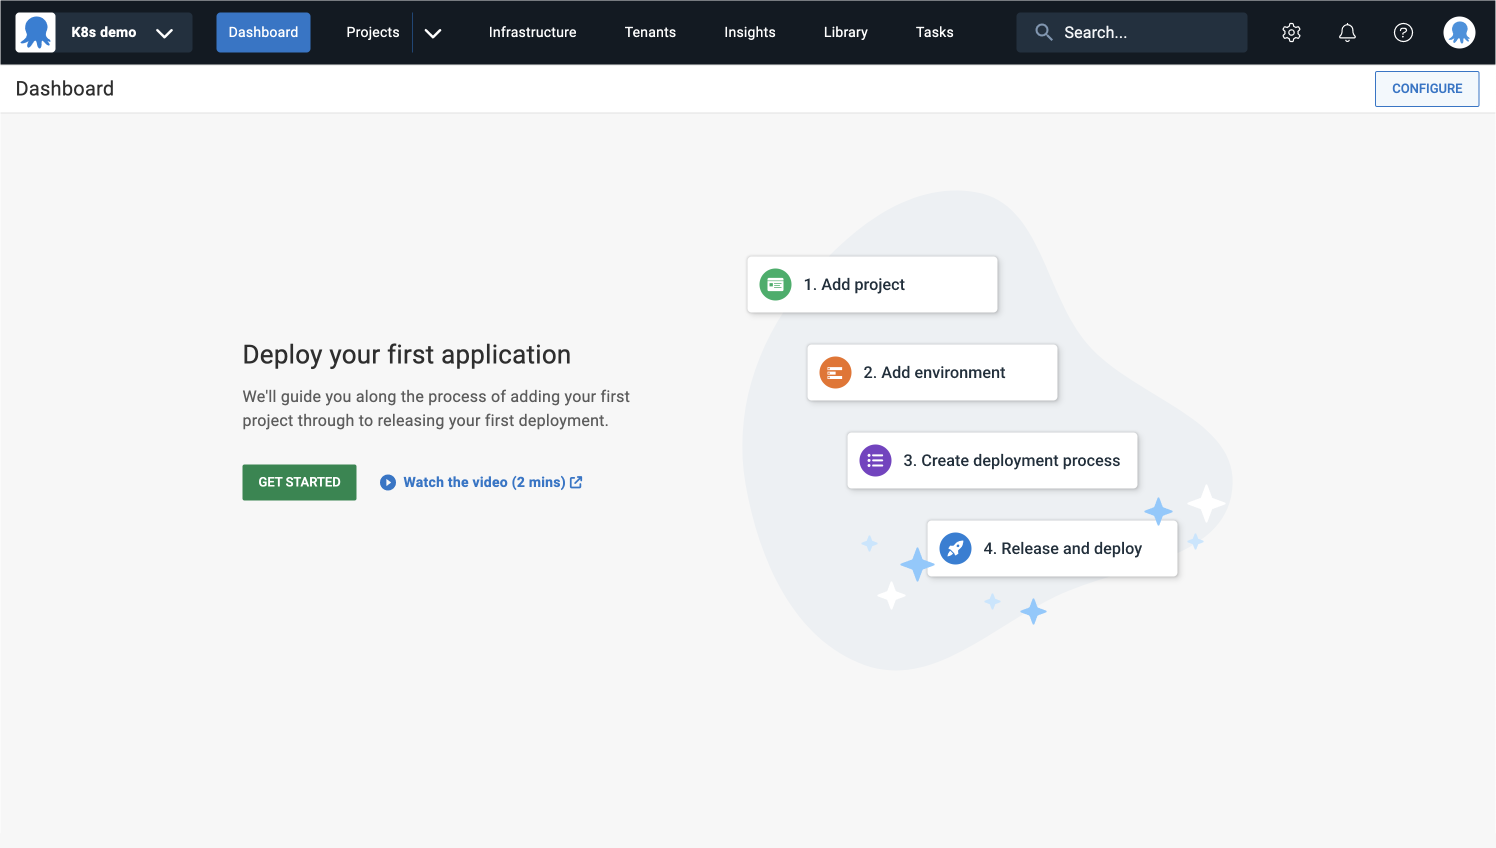
Log in to Octopus
- Log in to your Octopus instance and click GET STARTED.
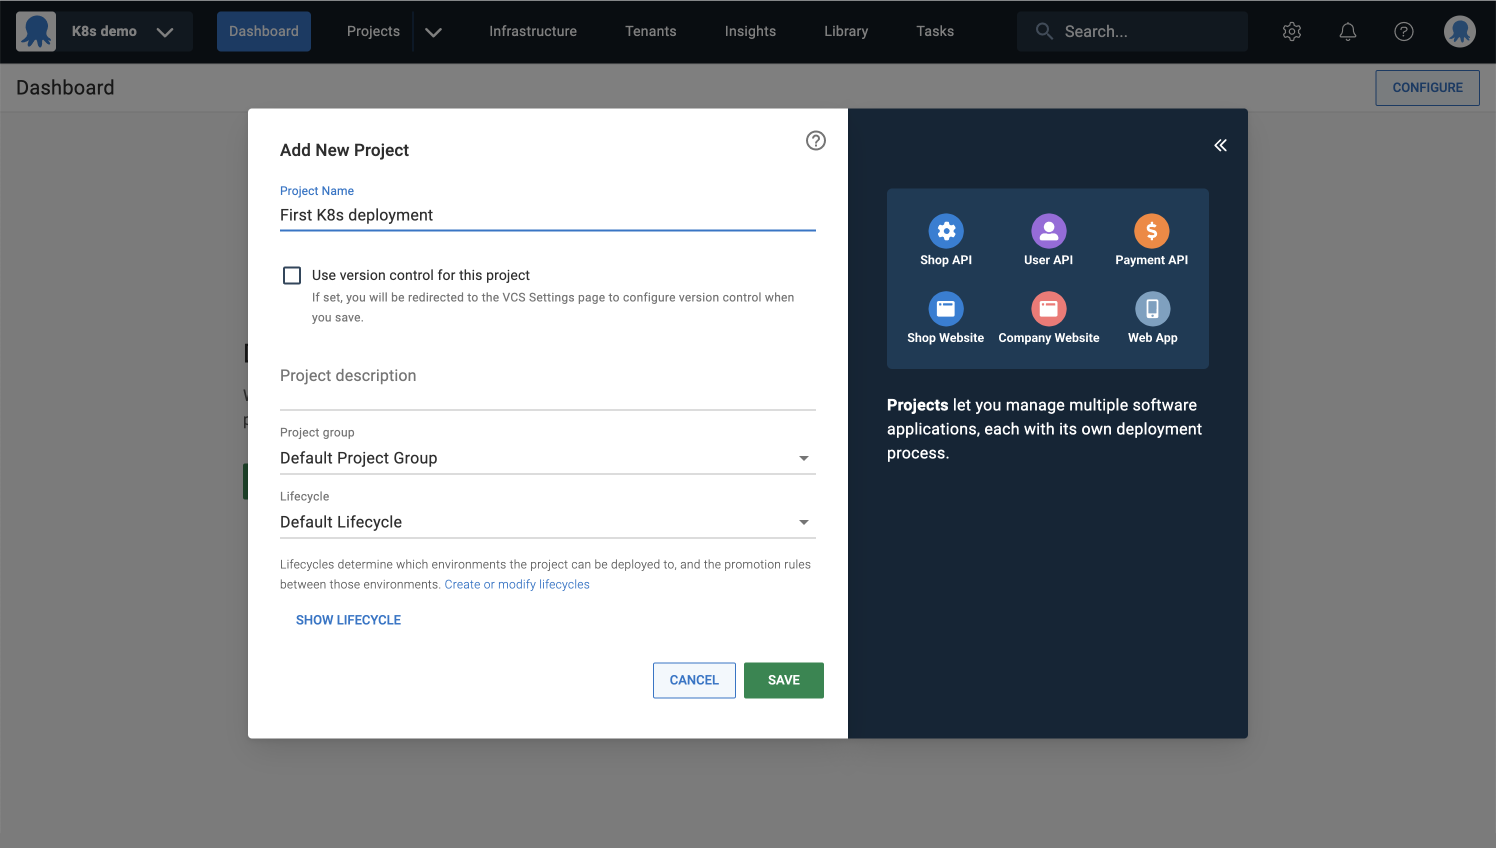
Add project
Projects let you manage software applications and services, each with its deployment process.
- Give your project a descriptive name and click SAVE.
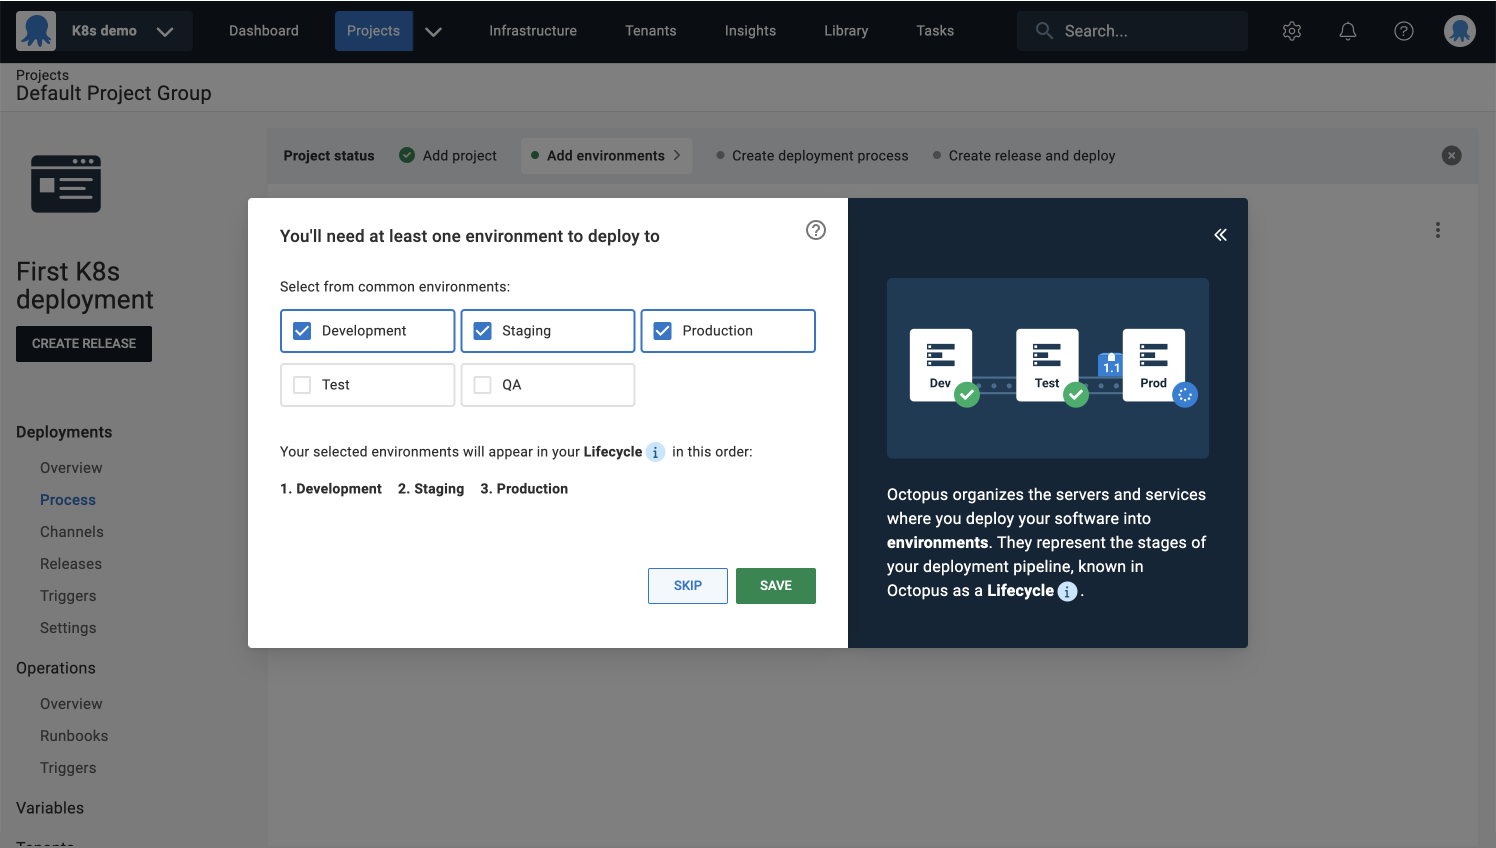
Add environments
You’ll need an environment to deploy to.
Environments are how you organize your infrastructure into groups representing the different stages of your deployment pipeline. For example, Dev, Test, and Production.
- Select the environments you’d like to create and click SAVE.
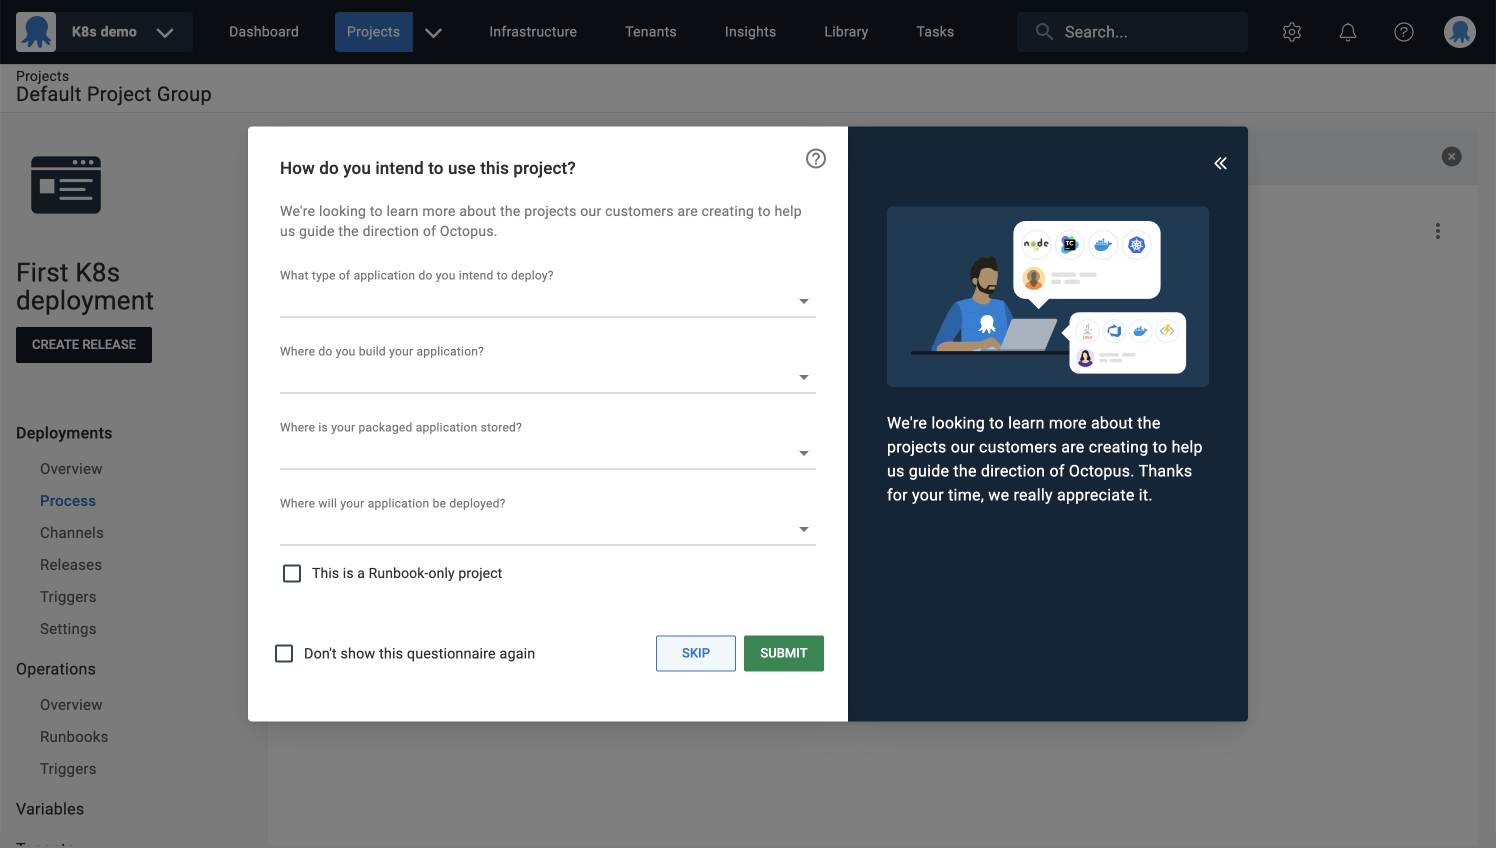
Project questionnaire (optional)
You have the option to fill out a short survey. This helps our team learn about the technologies our customers are using, which guides the future direction of Octopus. It should only take about 30 seconds to complete.
- Click SUBMIT, and you’ll be taken to your project.
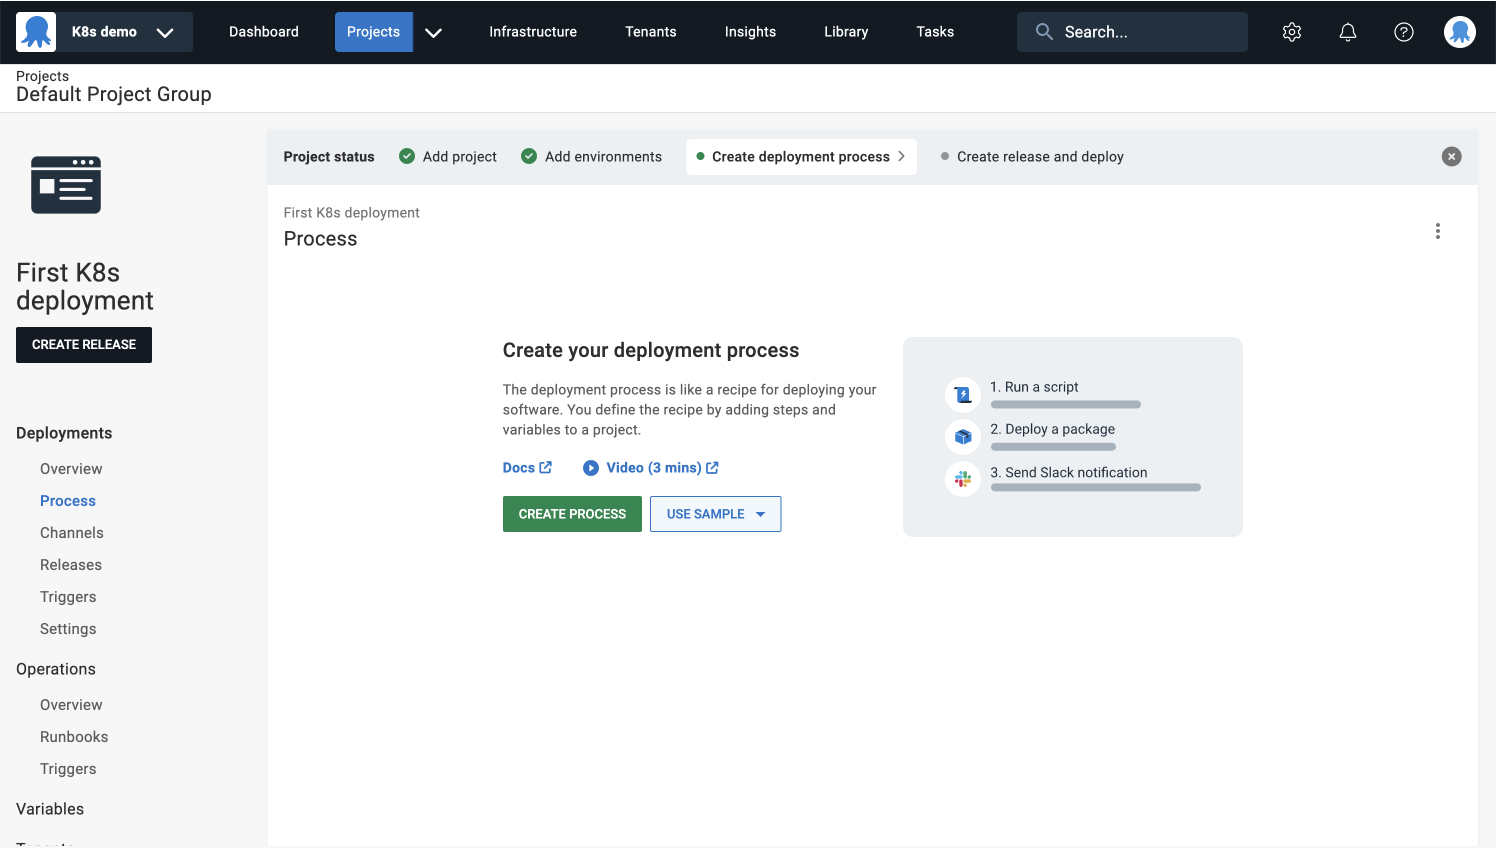
Create deployment process
The next step is creating your deployment process. This is where you define the steps that Octopus uses to deploy your software.
- Click CREATE PROCESS to see the available deployment steps.
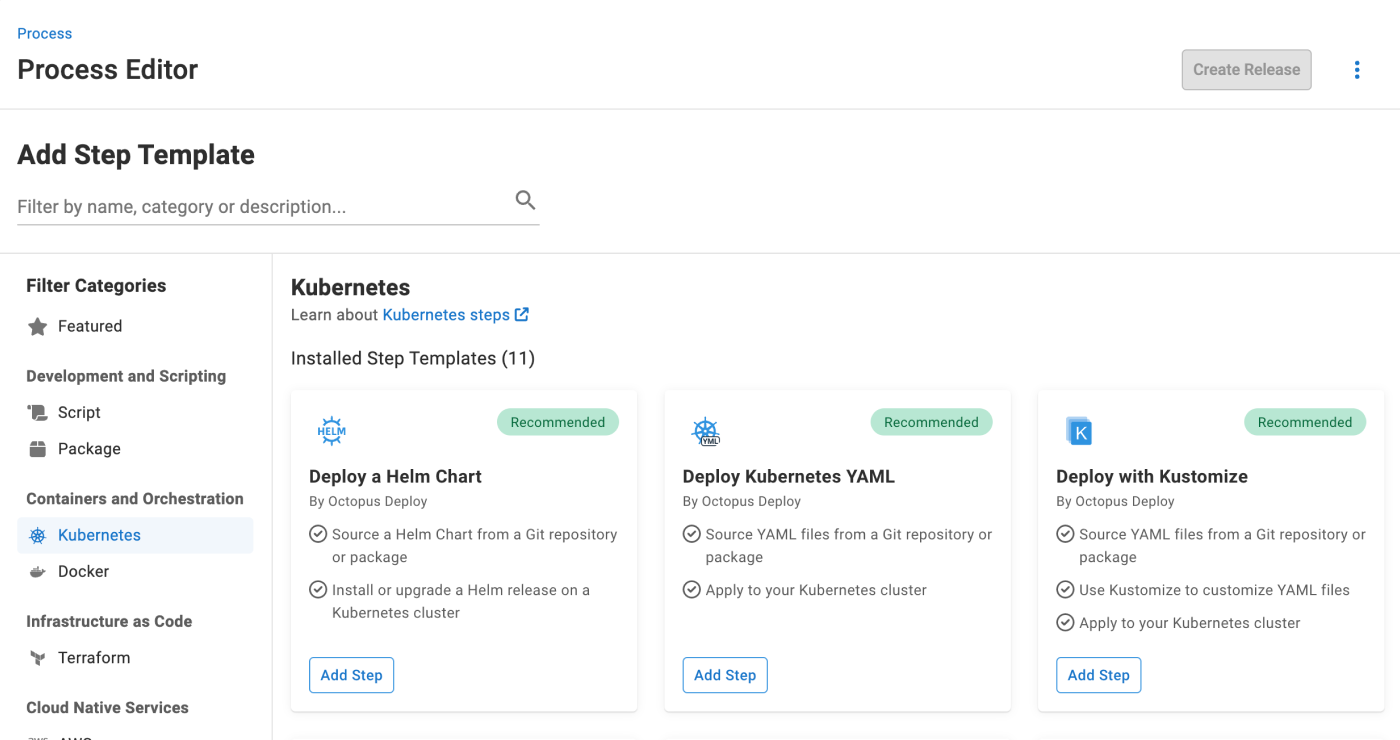
Configure Deploy raw Kubernetes YAML step
- Select the Kubernetes filter and then click the Deploy raw Kubernetes YAML card.
Step name
You can leave this as the default Deploy raw Kubernetes YAML.
Execution location
This step will run once on a worker on behalf of each deployment target.
Workers are machines that can execute tasks that don’t need to be run on the Octopus Server or individual deployment targets.
You’ll learn more about deployment targets later in this tutorial.
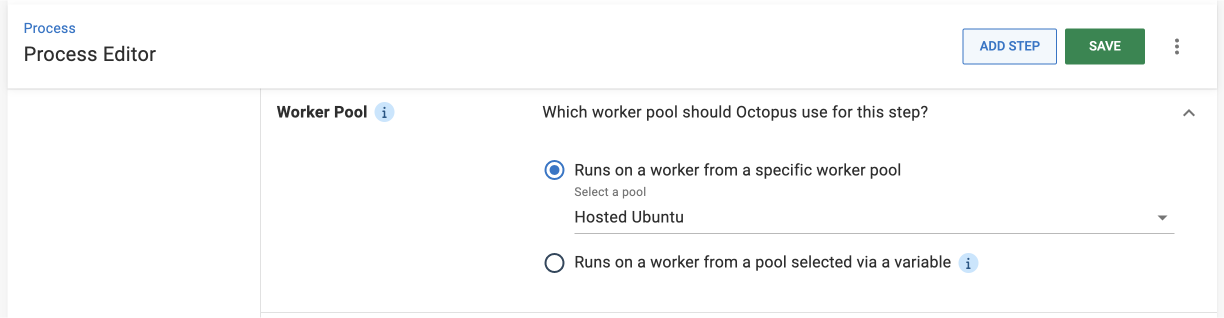
Worker Pool
Worker Pools are groups of Workers. When a task is assigned to a Worker, the task will be executed by one of the Workers in the pools you’ve configured.
- Select Runs on a worker from a specific pool.
- Select Hosted Ubuntu from the dropdown menu.
Target tags
Target tags (formerly target roles) select specific deployment targets in an environment. This step will run on all deployment targets with the tags you specify in this field.
- Add a new target tag by typing it into the field. For this example, we’ll use
k8s.
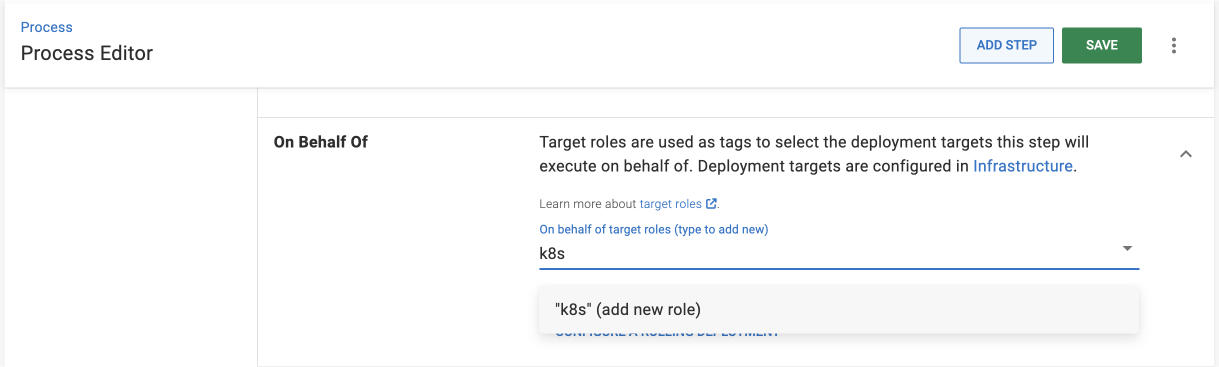
After configuring your deployment process, you’ll assign deployment targets to this target tag.
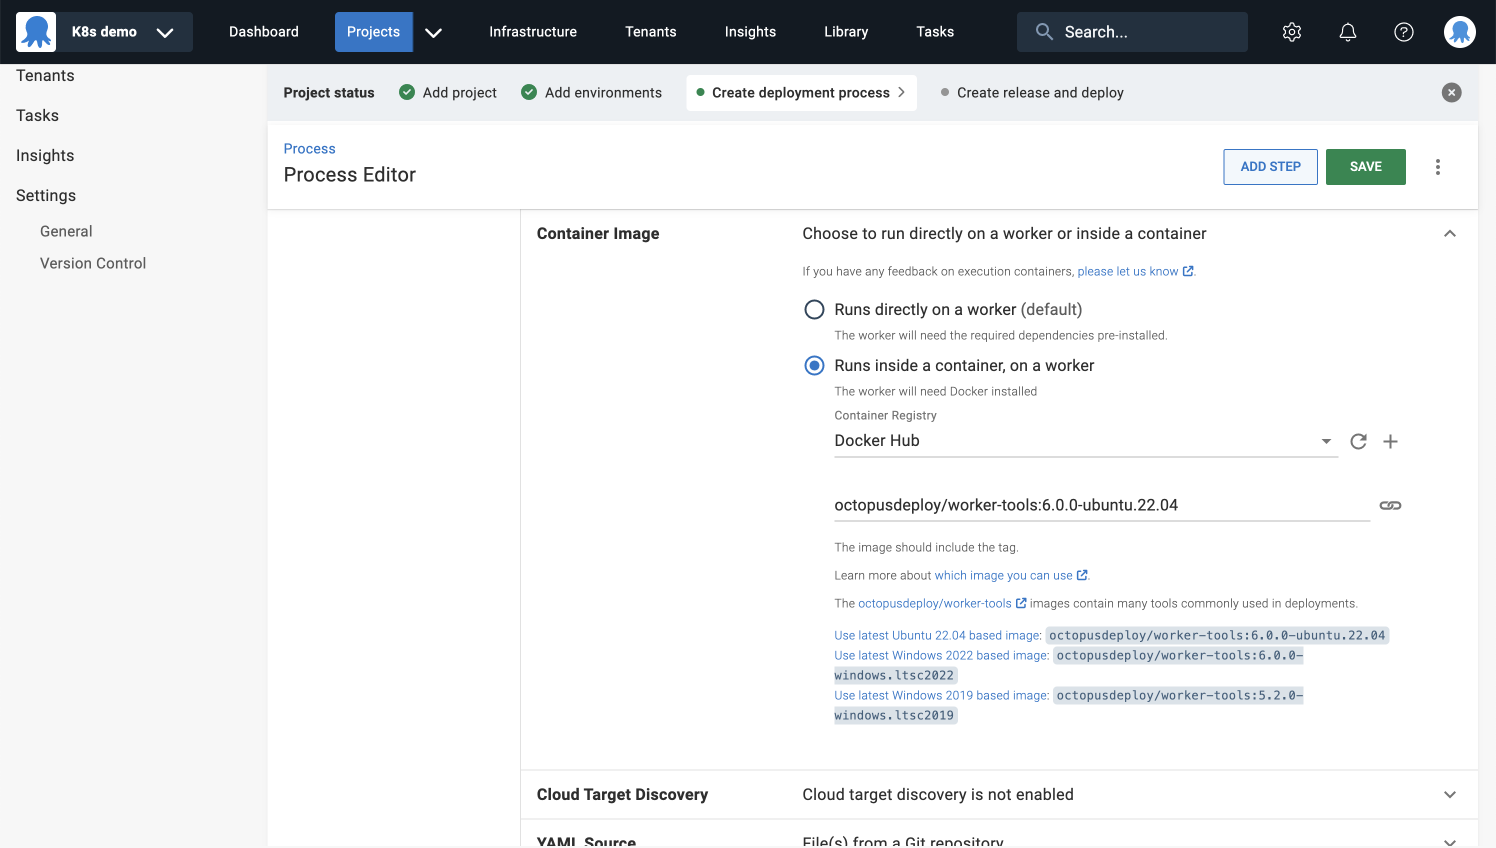
Container image
Next, you configure this step to run inside an execution container.
- Select Runs inside a container, on a worker.
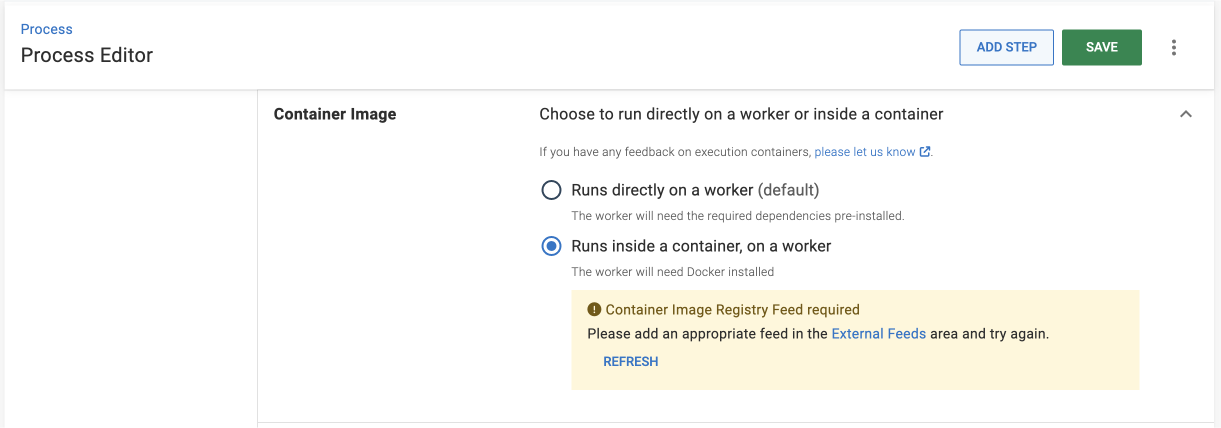
Add container image registry feed
For a step running on a Worker, you can select a Docker image to execute the step inside of.
Since you don’t have a Docker Container Registry available yet, you need to add one by following the steps below:
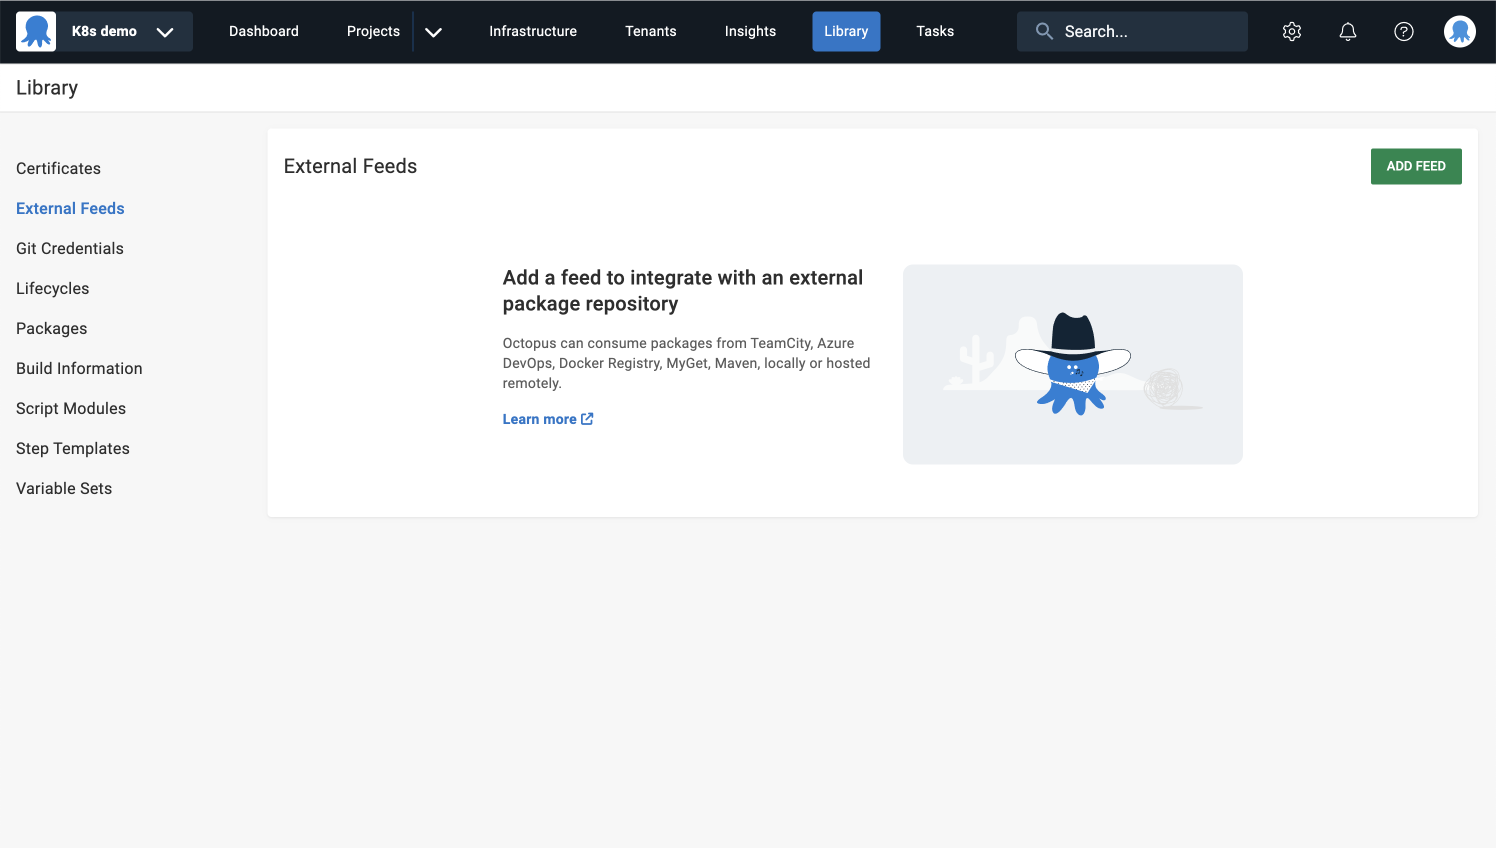
- Click the External Feeds link (this will open a new window).
- Click the ADD FEED button and select Docker Container Registry from the Feed Type dropdown.
- Provide a name for your feed, for example
Docker Hub. - Enter the feed URL to the public Docker Hub registry, for example
https://index.docker.io. - You can leave the registry path blank for this example.
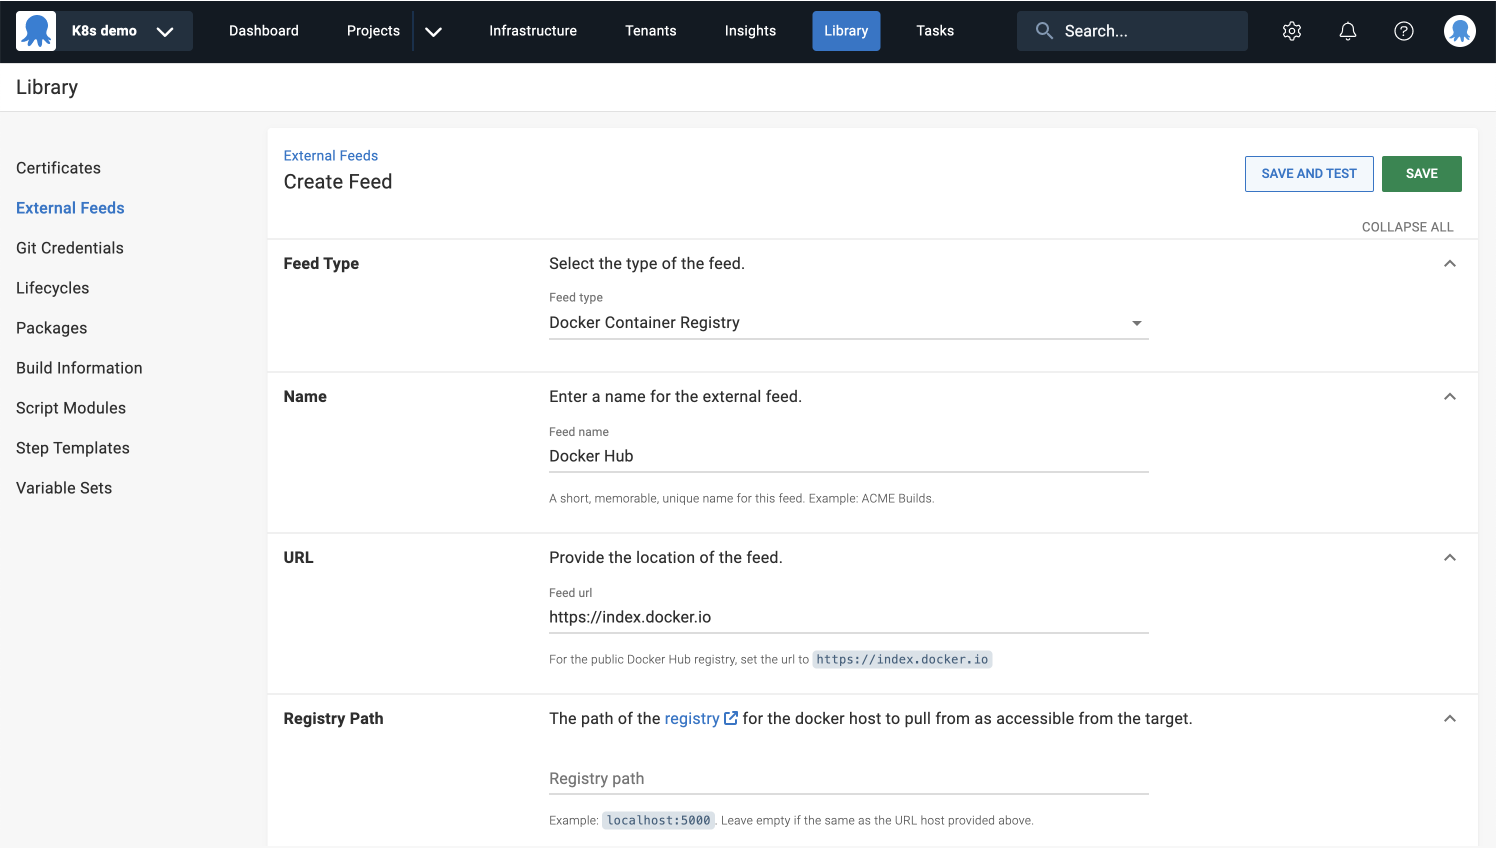
- Provide your credentials for Docker Hub.
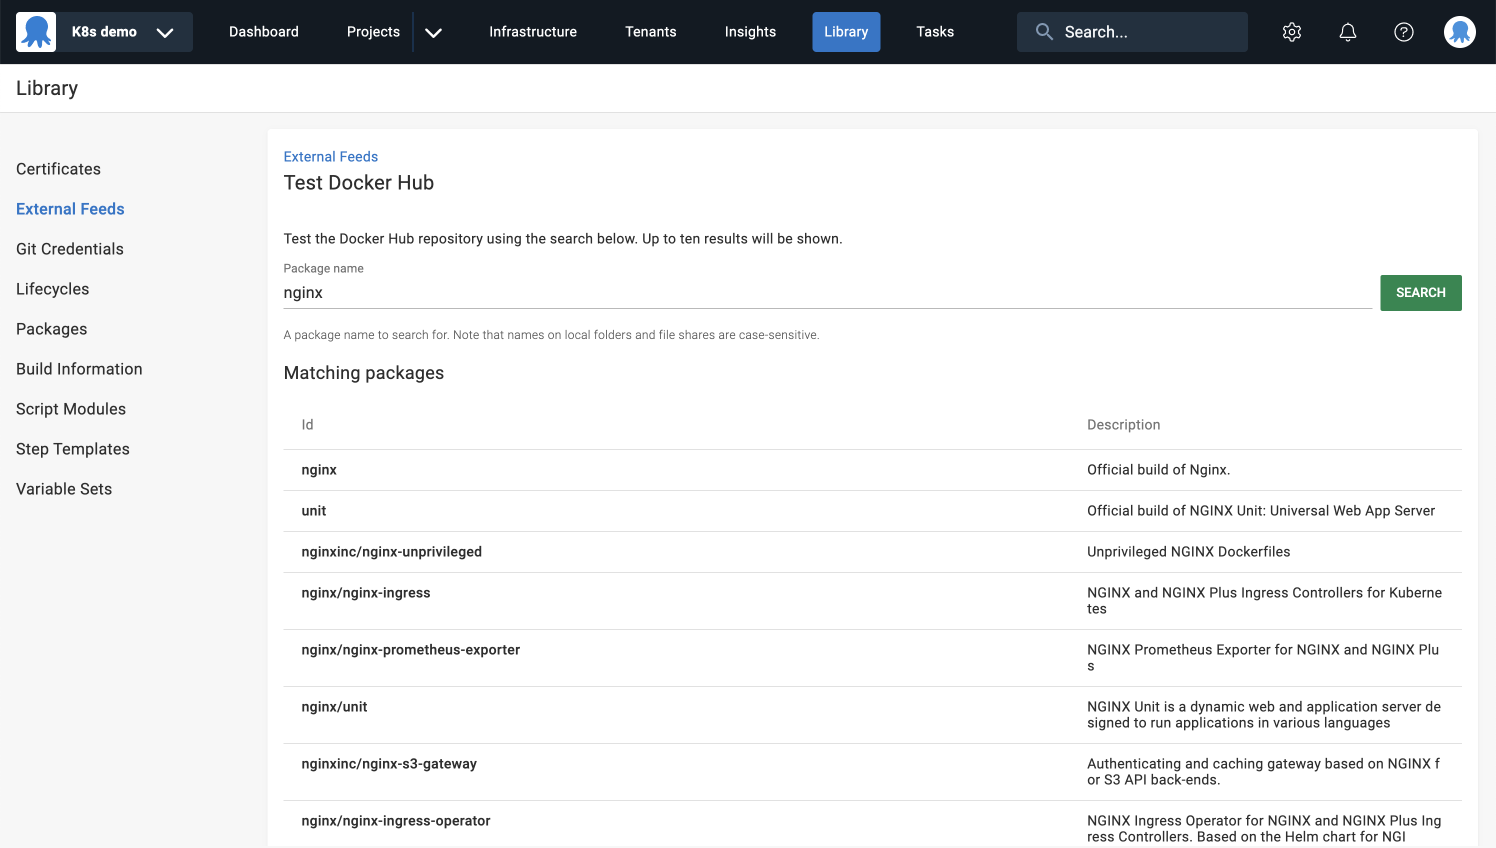
- Click SAVE AND TEST, and then type
nginxinto the package name field to test your external feed.
Close the window and return to configuring the Deploy raw Kubernetes YAML step.
Container image
- Click REFRESH and select Docker Hub as your Container Registry.
- Copy the latest Ubuntu-based image from the help text and paste it into the container image field.
YAML source
This step lets you get your YAML from 3 different sources:
- Git repository (default)
- Package
- Inline script
Sourcing from a Git repository can streamline your deployment process by reducing the steps required to get your YAML into Octopus.
- Select Git Repository as your YAML source.
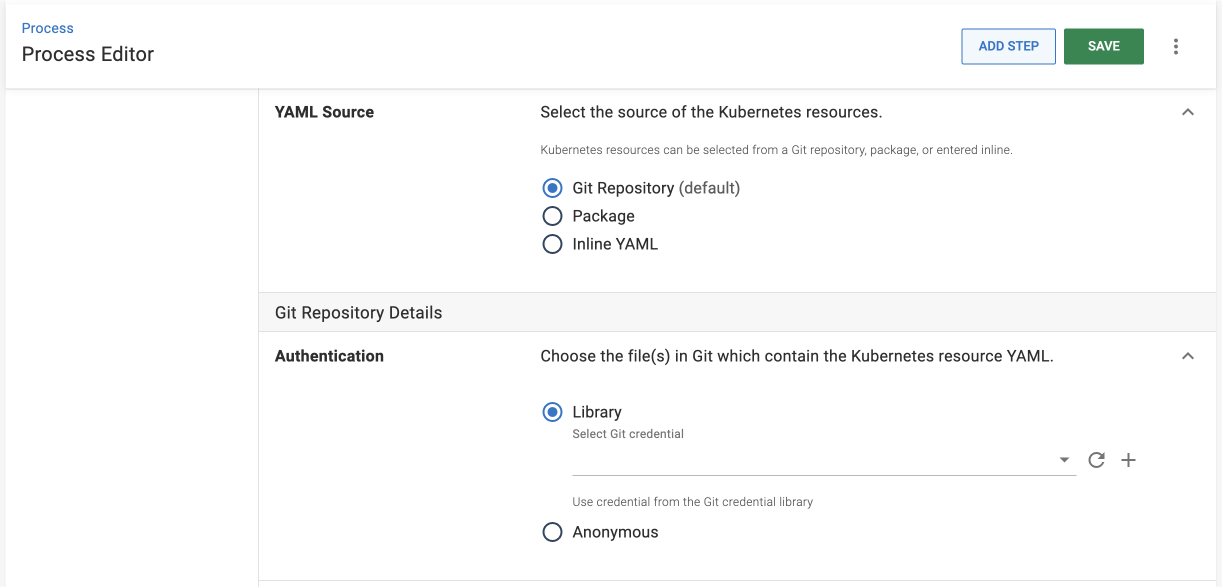
Git repository details
- Select Library and add a new Git credential by clicking the + icon.
- Click the ADD GIT CREDENTIAL button.
- Enter a name for your Git credential.
- Provide your GitHub username.

Generate GitHub personal access token
Github.com now requires token-based authentication (this excludes GitHub Enterprise Server). Create a personal access token following the steps below or learn more in the GitHub documentation.
- Navigate to github.com and log in to your account.
- Click your profile picture in the top right corner.
- Click SETTINGS.
- Scroll down to the bottom of the page and click DEVELOPER SETTINGS.
- Under Personal access tokens, click FINE-GRAINED TOKENS.
- Click GENERATE NEW TOKEN.
- Under Token name, enter a name for the token.
- Under Expiration, provide an expiration for the token.
- Select a Resource Owner.
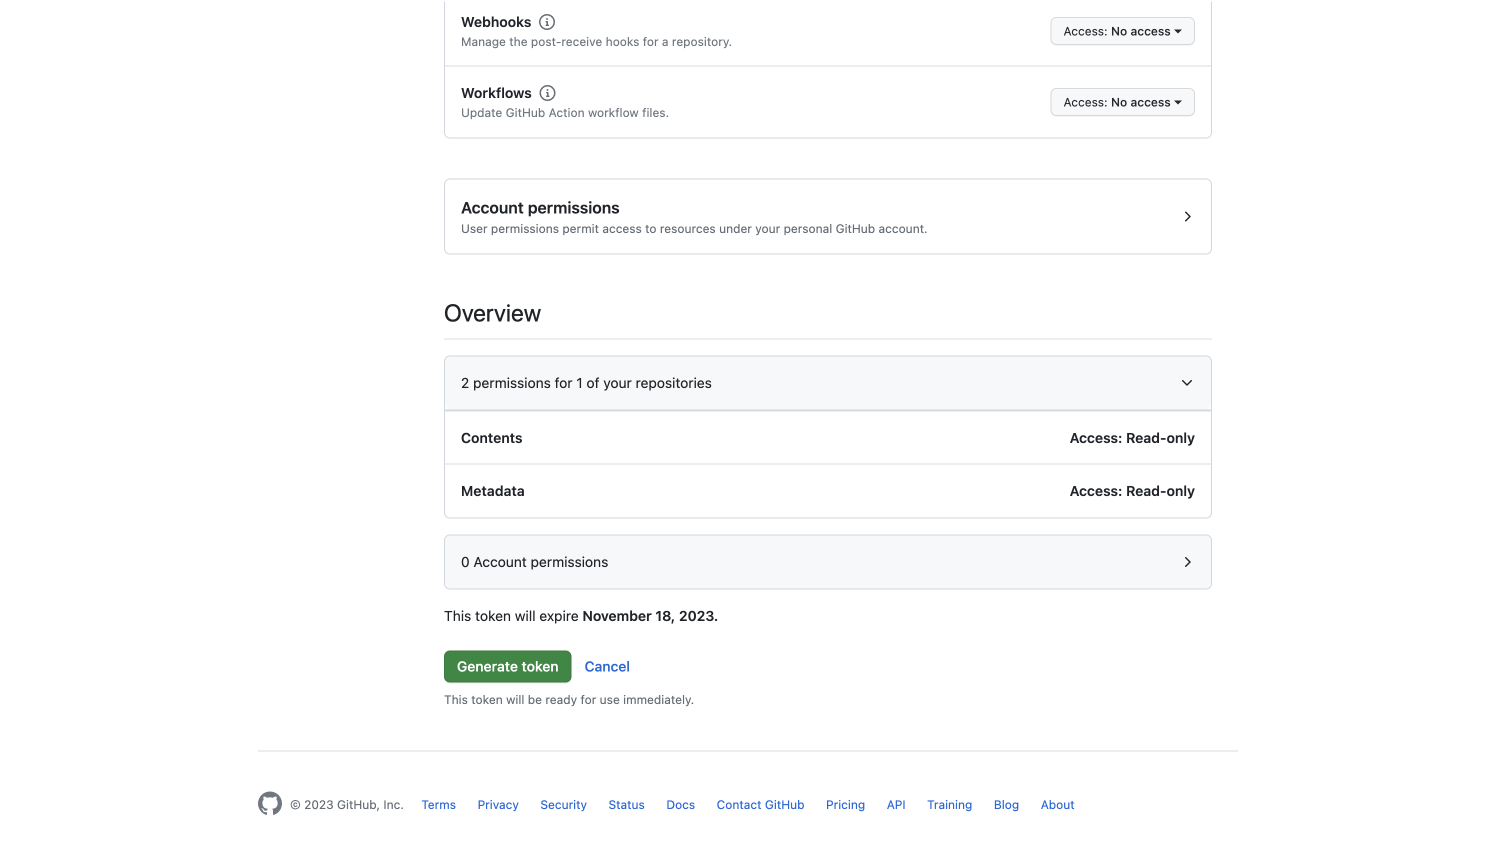
- Under Repository Access, choose Only select repositories and select the OctoPetShop repository from the dropdown.
- Click REPOSITORY PERMISSIONS, scroll down to Contents and select Read-only.
- Scroll down to the Overview, and you should have 2 permissions for one of your repositories (contents and metadata).
- Click Generate token and copy the token.
Git repository details
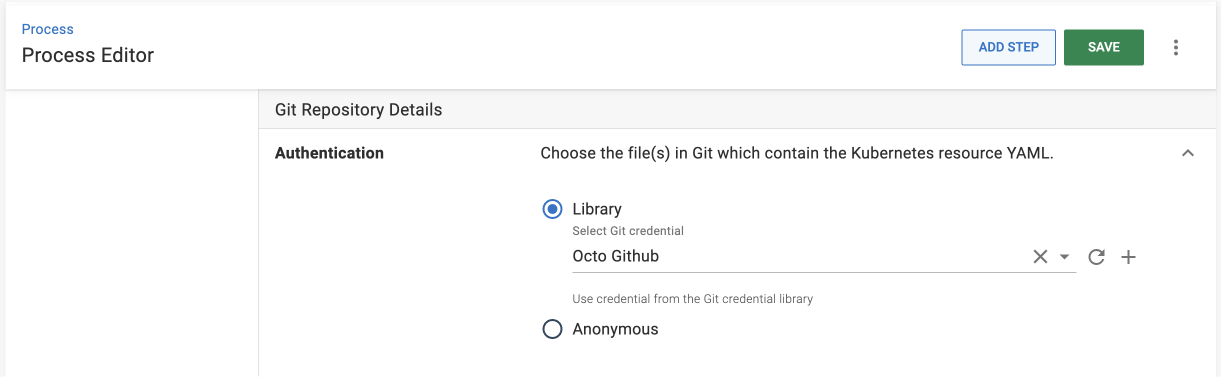
- Paste the token into Octopus’s personal access token field.
- Save your Git credential and return to the Deploy raw Kubernetes YAML step.
- Click the refresh icon next to the Select Git credential dropdown.
- Select the Git credential you created earlier.
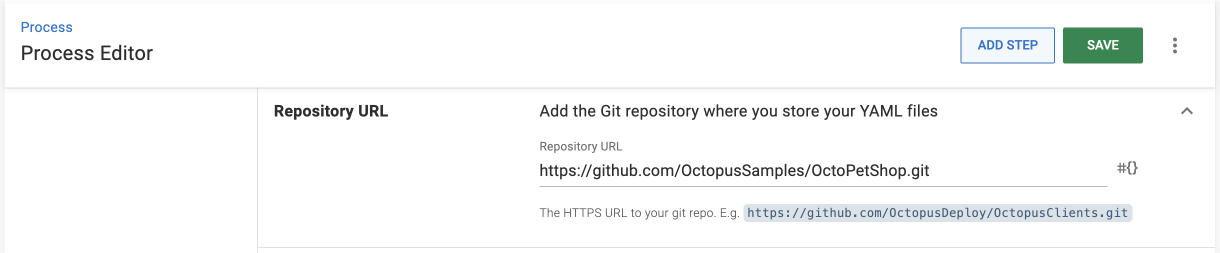
Repository URL
- Enter the full URL to the Git repository where you store the YAML files you want to deploy, for example
https://github.com/your-user/OctoPetShop.git.
Branch settings
- Provide the default branch you want to use, for example master if you’re using the sample repo.
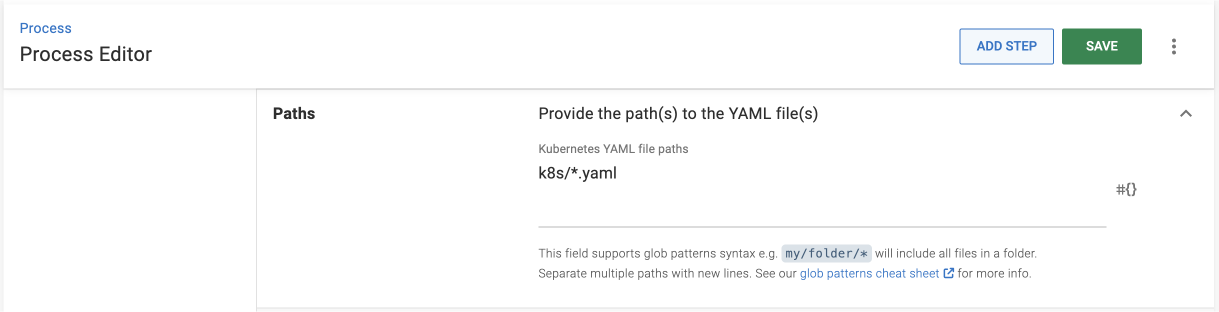
Paths
- Enter the relative path(s) to the YAML files you want to deploy to your cluster. If you’re using the sample repo, the path will be
k8s/*.yaml.
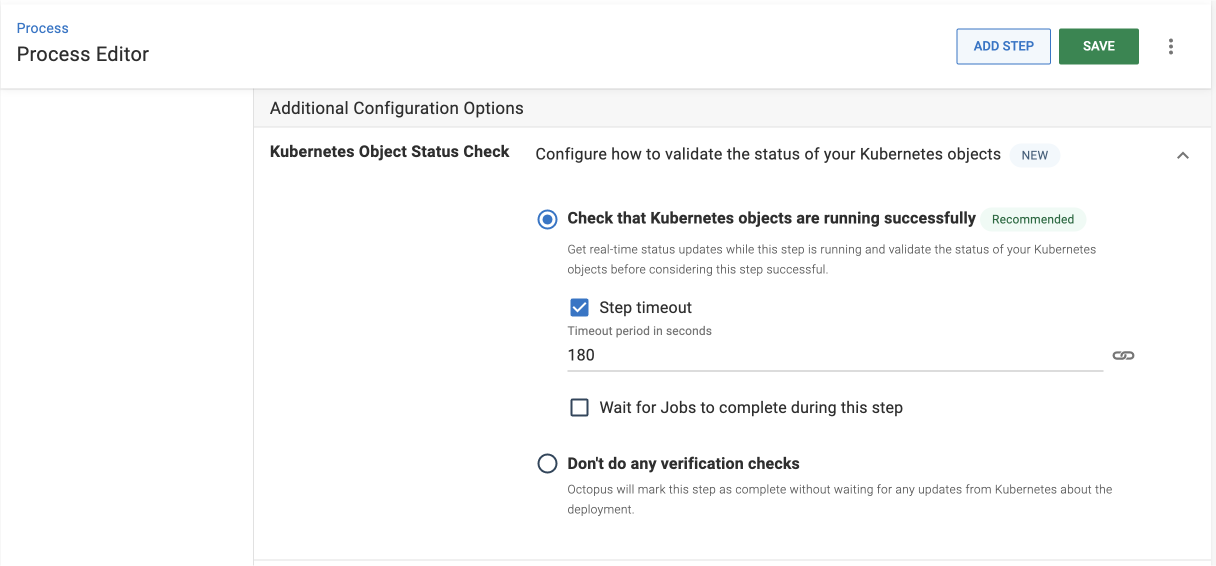
Kubernetes object status check
This feature gives you live status updates during deployment for all the Kubernetes objects you’re deploying.
- Keep the default Check that Kubernetes objects are running successfully option selected with the default timeout of 180 seconds.
Structured configuration variables
This is an advanced feature that you can skip for this tutorial. Learn more about structured configuration variables in our docs.
Referenced packages
This is an advanced feature that you can skip for this tutorial. Learn more about references packages in our docs.
Namespace
- Specify the namespace in the cluster where you want to deploy your YAML files, for example
demo-namespace.
If the namespace doesn’t exist yet, Octopus will create it during the deployment.
Conditions
You can set conditions for greater control over how each step in your deployment process gets executed.
You can skip all the fields under this section for your first deployment.
Save your step and then move on to the next section to add your Kubernetes deployment target.
Add a deployment target
With Octopus Deploy, you can deploy software to:
- Kubernetes clusters
- Microsoft Azure
- AWS
- Cloud regions
- Windows servers
- Linux servers
- Offline package drops
Wherever you’re deploying your software, these machines and services are known as your deployment targets.
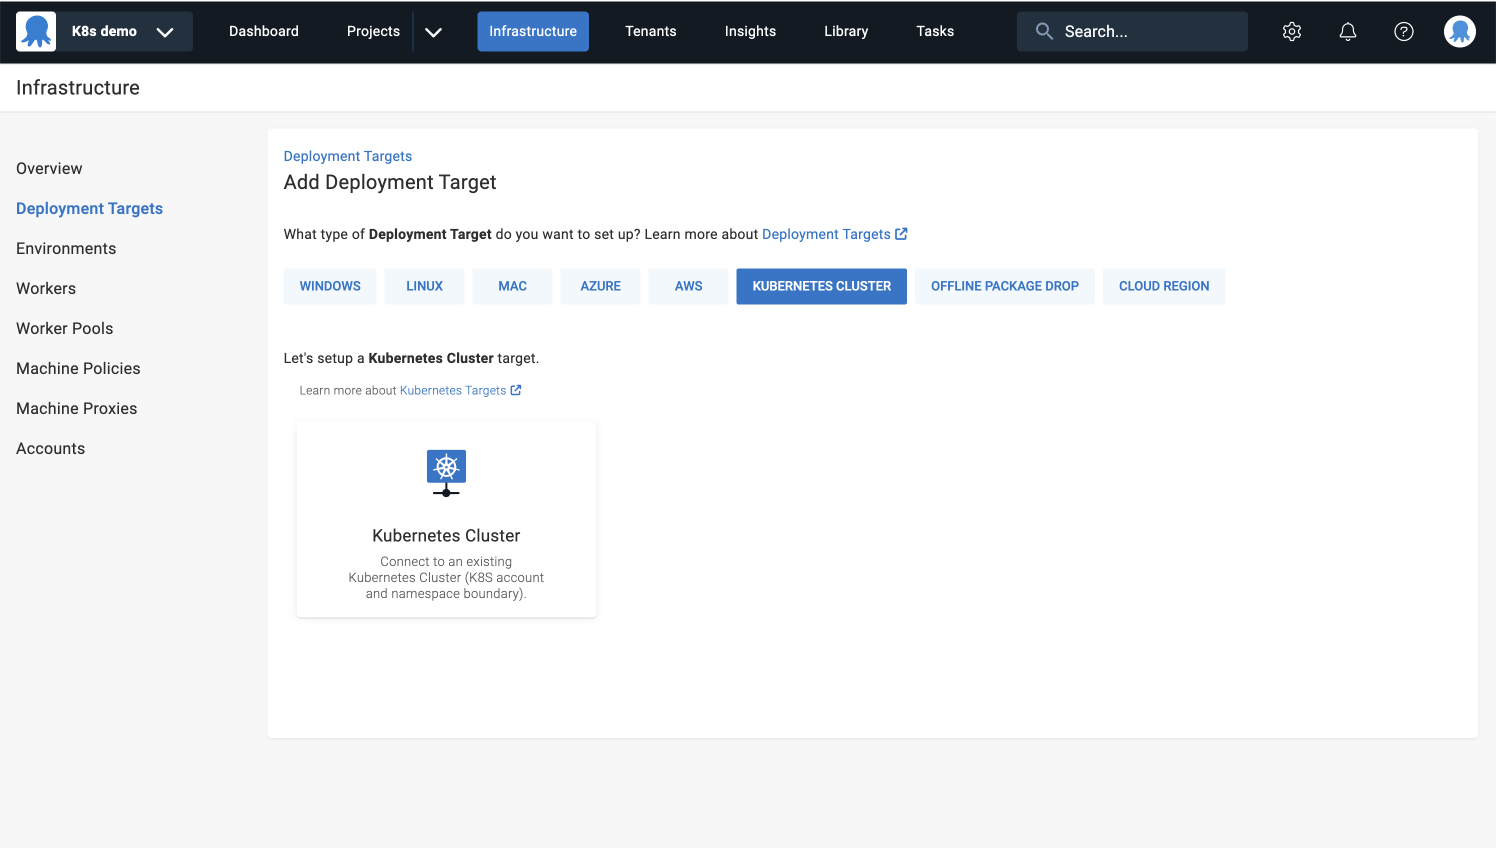
- Navigate to Infrastructure ➜ Deployment Targets, and click ADD DEPLOYMENT TARGET.
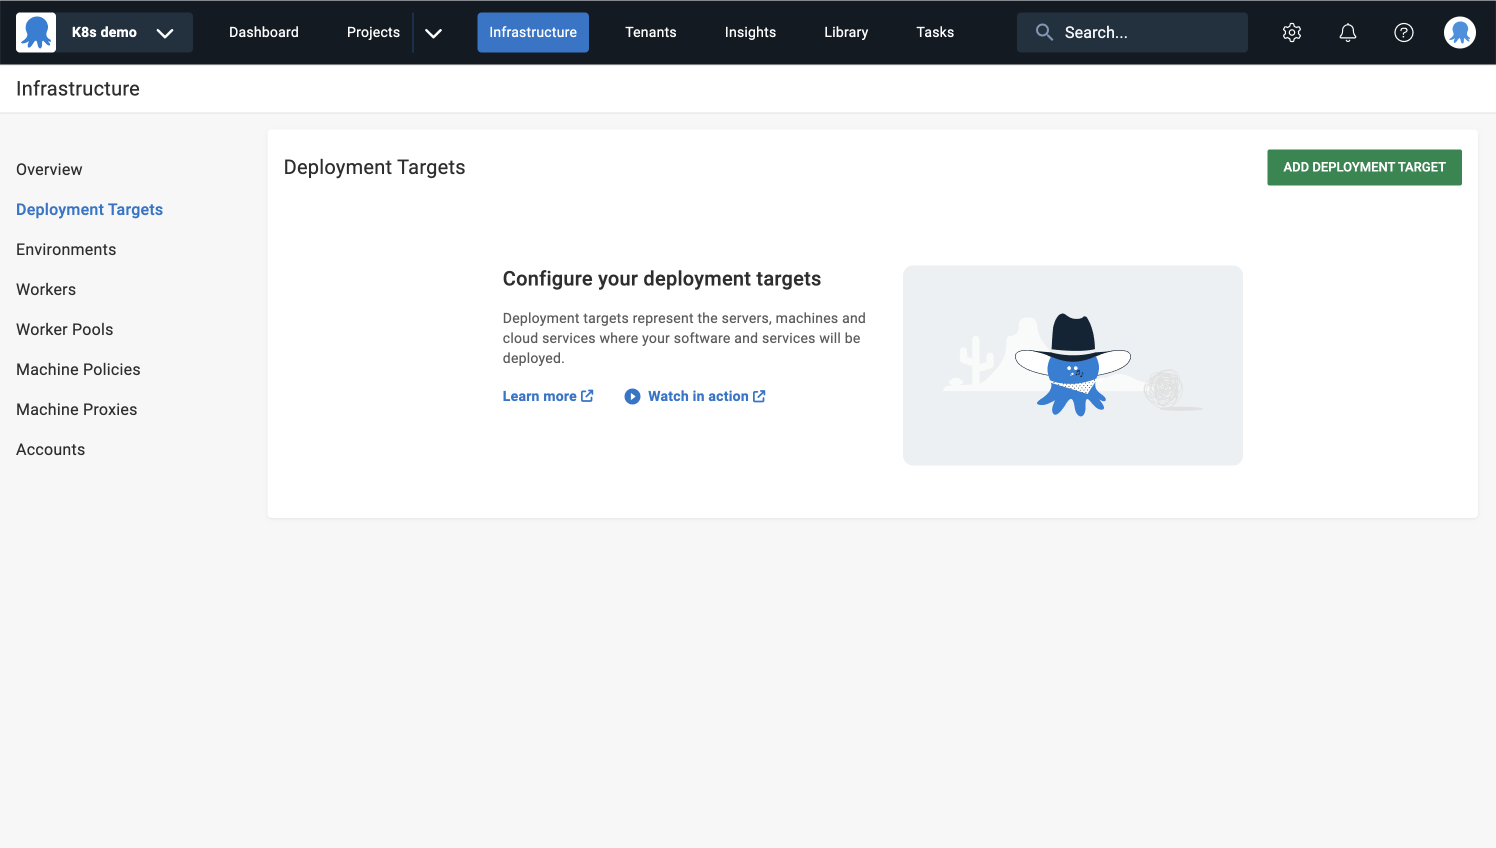
- Select KUBERNETES CLUSTER and click ADD on the Kubernetes Cluster card.
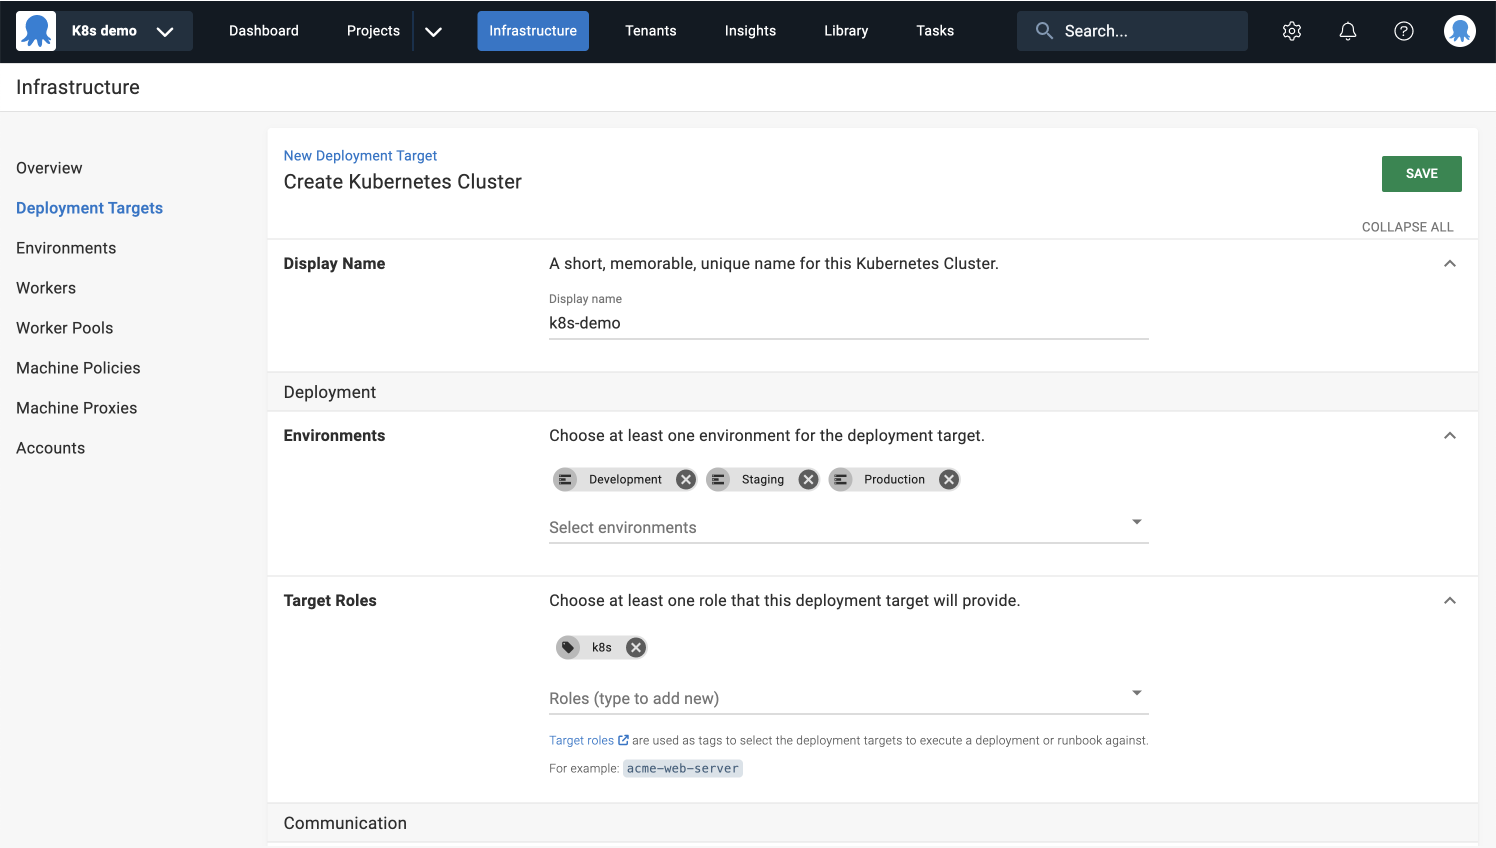
Display name
- Enter
k8s-demoin the Display Name field.
Environments
- Select Development, Staging, and Production from the dropdown list.
Target tags
- Type in the same target tag you provided while configuring the Deploy raw Kubernetes YAML step, for example
k8s.
The target tag won’t be available to select from the dropdown list yet, because it gets created during this step.
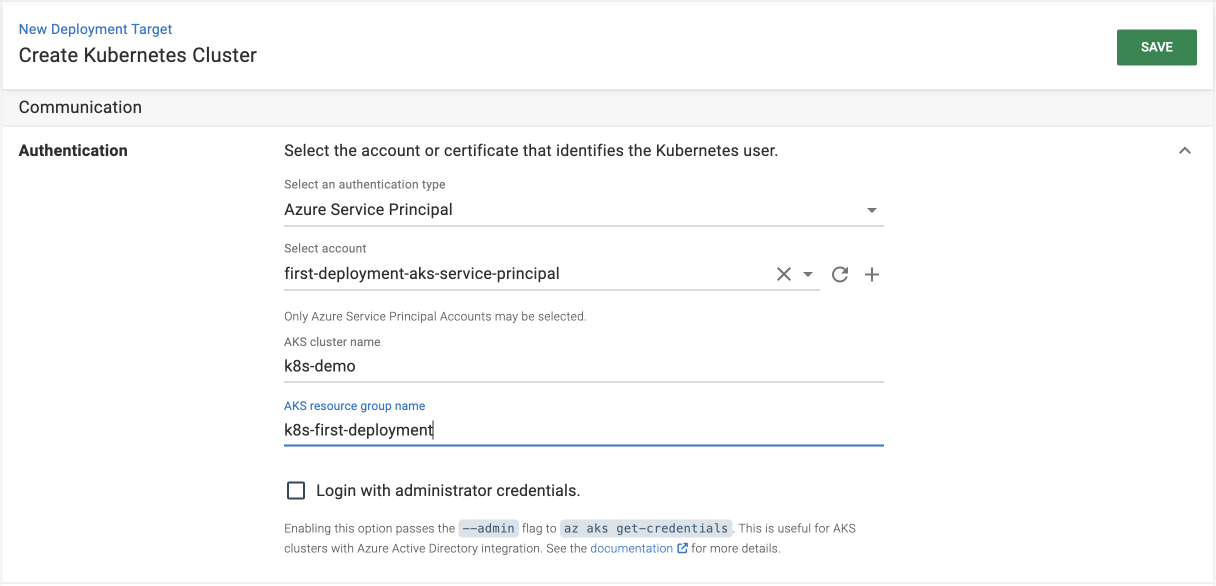
Authentication
Octopus provides multiple methods for authenticating your Kubernetes cluster depending on your setup, including:
| Service | Octopus Authentication Method | Notes |
|---|---|---|
| AKS | Azure Service Principal | The Azure Service Principal is only used with AKS clusters. To log into ACS or ACS-Engine clusters, you must use standard Kubernetes credentials like certificates or service account tokens. Learn more in the Azure docs. |
| GKE | Google Cloud Account | When using a GKE cluster, Google Cloud accounts let you authenticate using a Google Cloud IAM service account. Learn more in the GKE docs. |
| EKS | AWS Account | When using an EKS cluster, AWS accounts let you use IAM accounts and roles. Learn more in the AWS docs. |
| Other | Tokens Username and password Client certificate | Learn more in the Kubernetes cluster docs. |
Here are brief instructions on how to configure your cluster authentication in Octopus, since it will depend on your specific situation:
- Select the appropriate authentication method from the list.
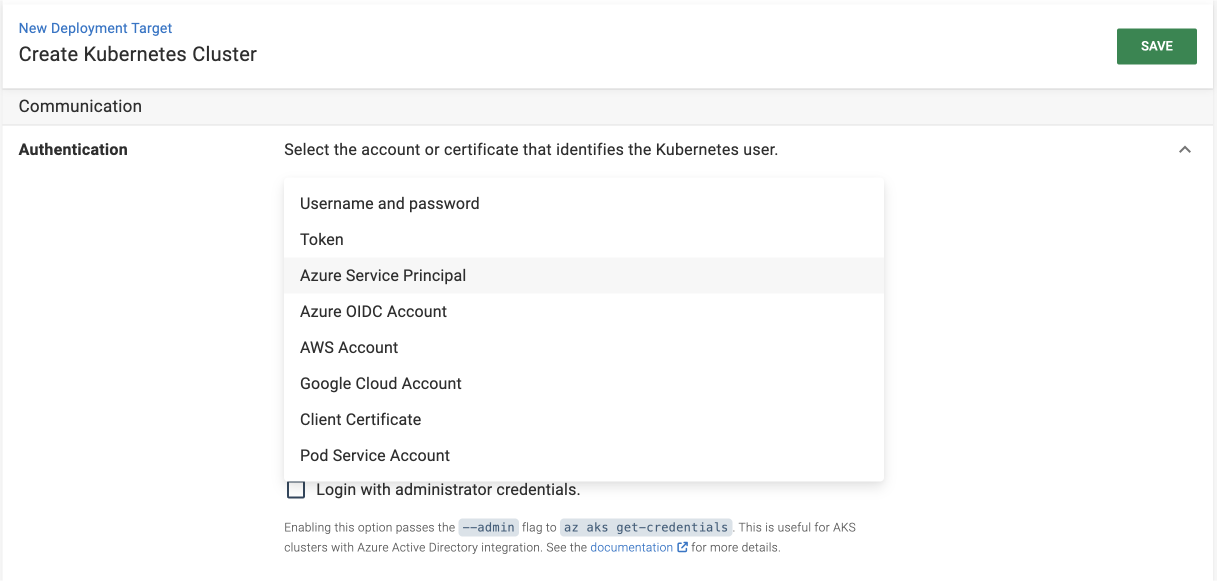
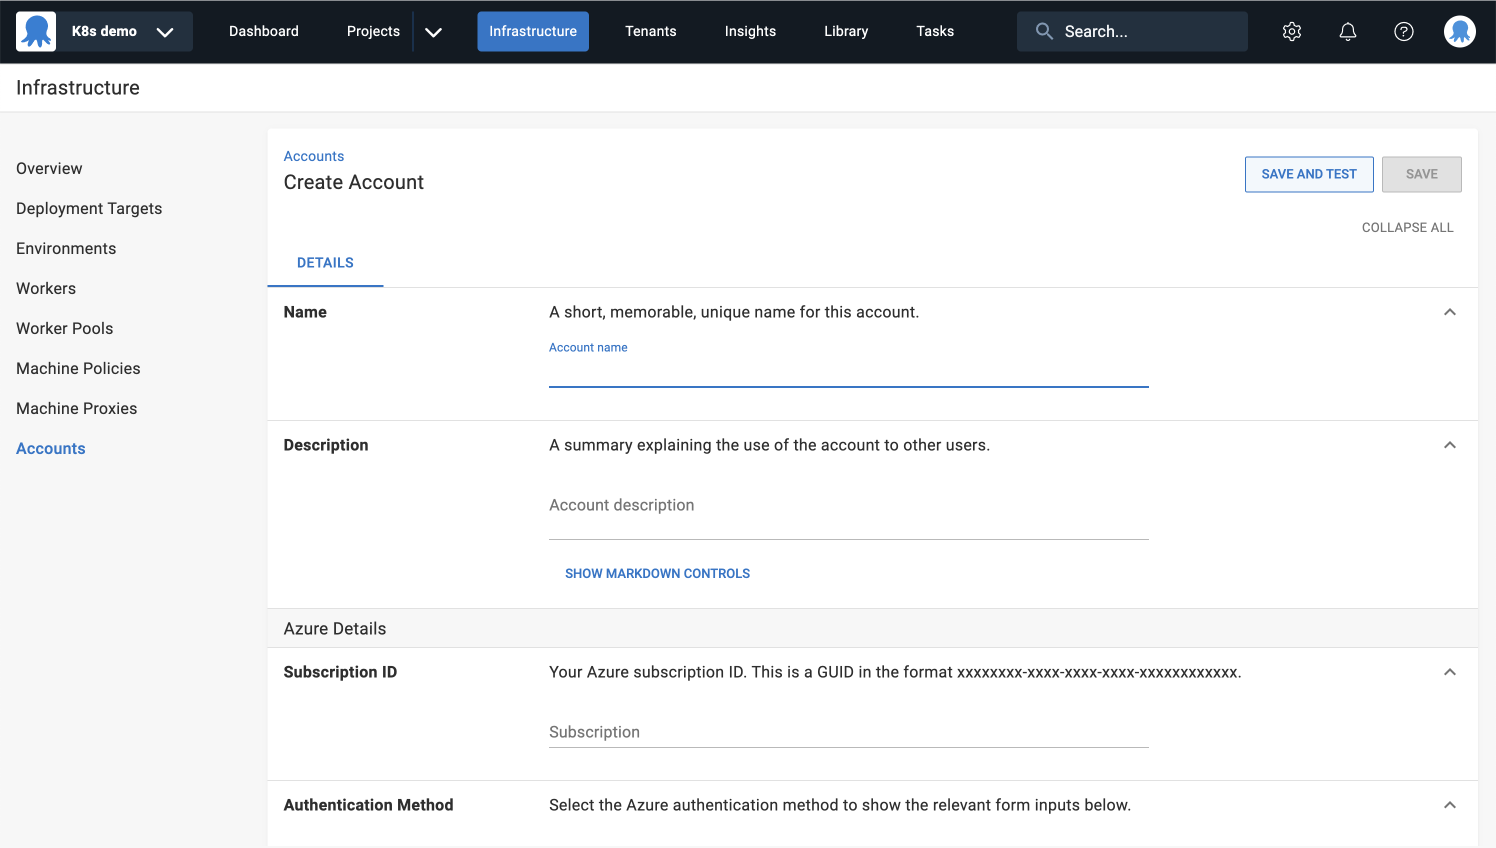
- Add a new account with the authentication details needed to access your cluster (more detailed instructions are linked in the table above).
- Complete the target authentication configuration fields like cluster name, resource group, etc.
Need more details on how to configure various authentication methods? Read the Kubernetes cluster docs.
Kubernetes namespace
- Specify the namespace for this deployment target, for example
default.
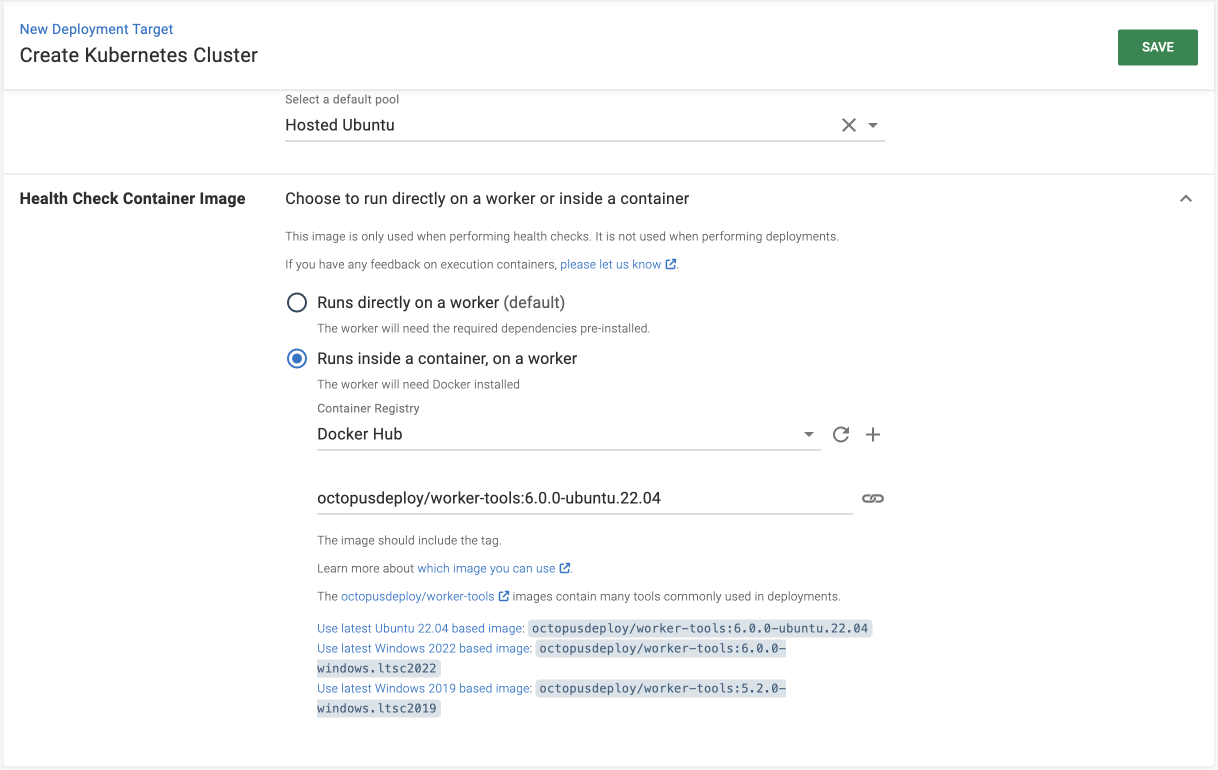
Worker Pool
- Select Hosted Ubuntu as the default Worker Pool.
Health check container image
- Select Runs inside a container, on a Worker.
- Select Docker Hub as the container registry.
- Copy the Ubuntu-based image and paste it into the container image field.
- SAVE your deployment target.
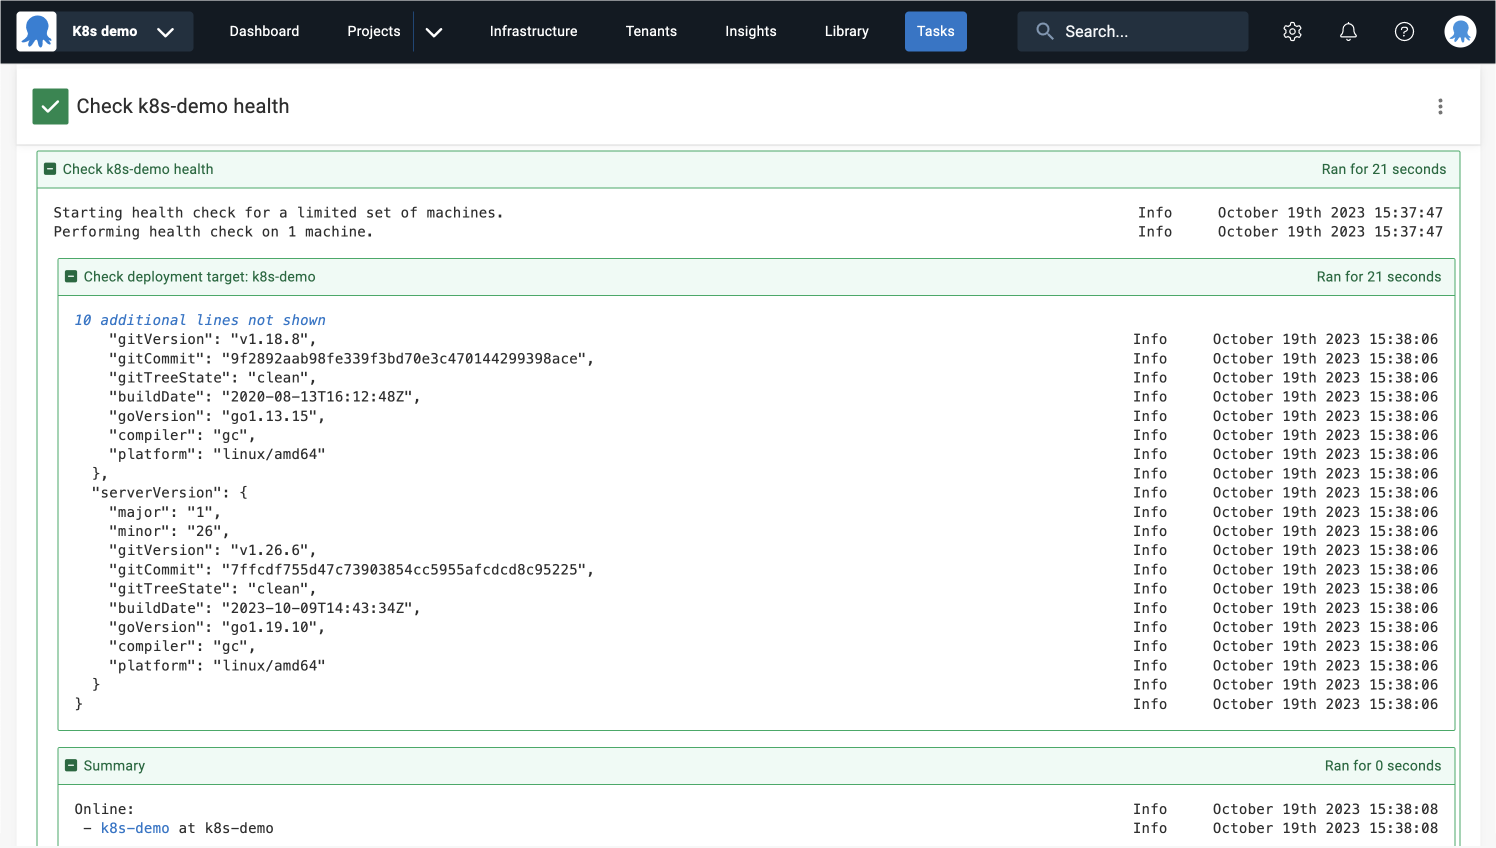
Health check
Octopus runs health checks on deployment targets and Workers to ensure they’re available and running the latest version of Calamari.
This process may take a few minutes since it’s acquiring the Worker and it needs to download the Worker Tools image.
- After saving, navigate to Connectivity in the left sidebar menu.
- Click the CHECK HEALTH button.
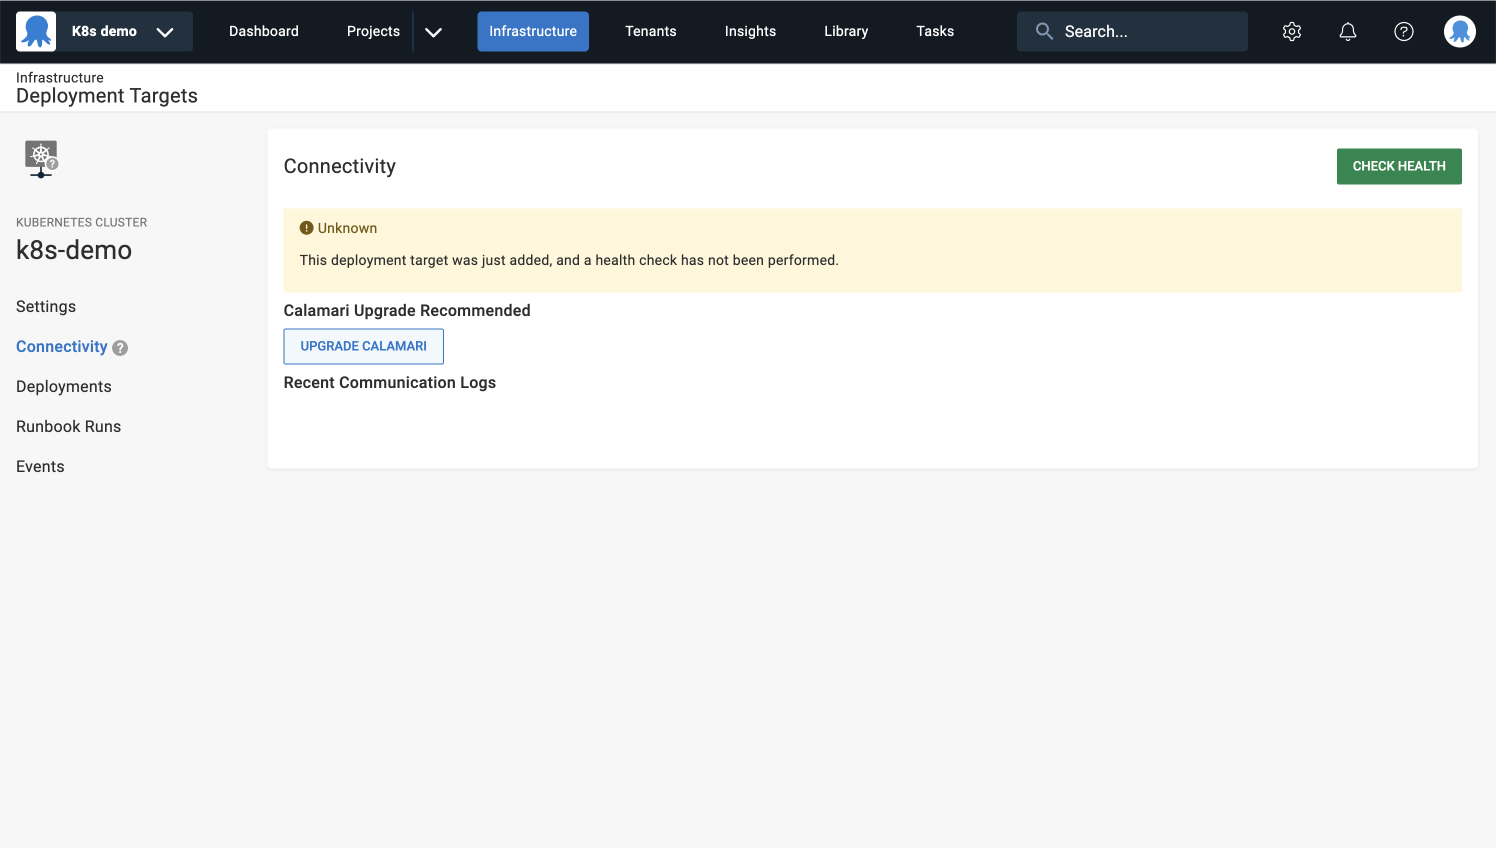
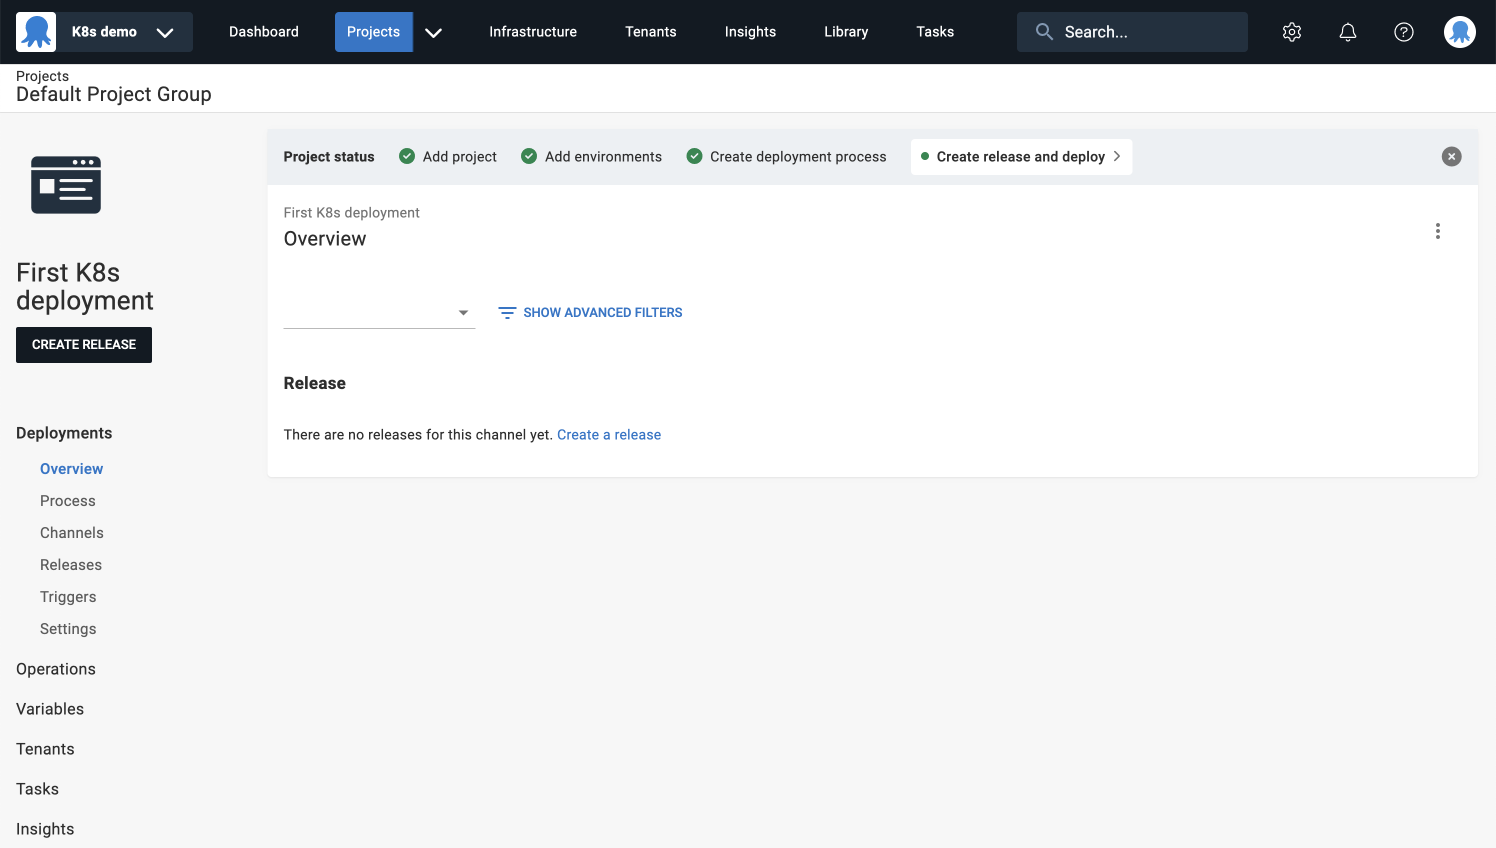
You can create and deploy a release now that you have a healthy deployment target.
Release and deploy
Create release
A release is a snapshot of the deployment process and the associated assets (Git resources, variables, etc.) as they exist when the release is created.
- Navigate to Projects in the top navigation and select your First K8s deployment project.
- Click the CREATE RELEASE button.
You’ll see a summary of the Git resources you provided in the Deploy raw YAML step.
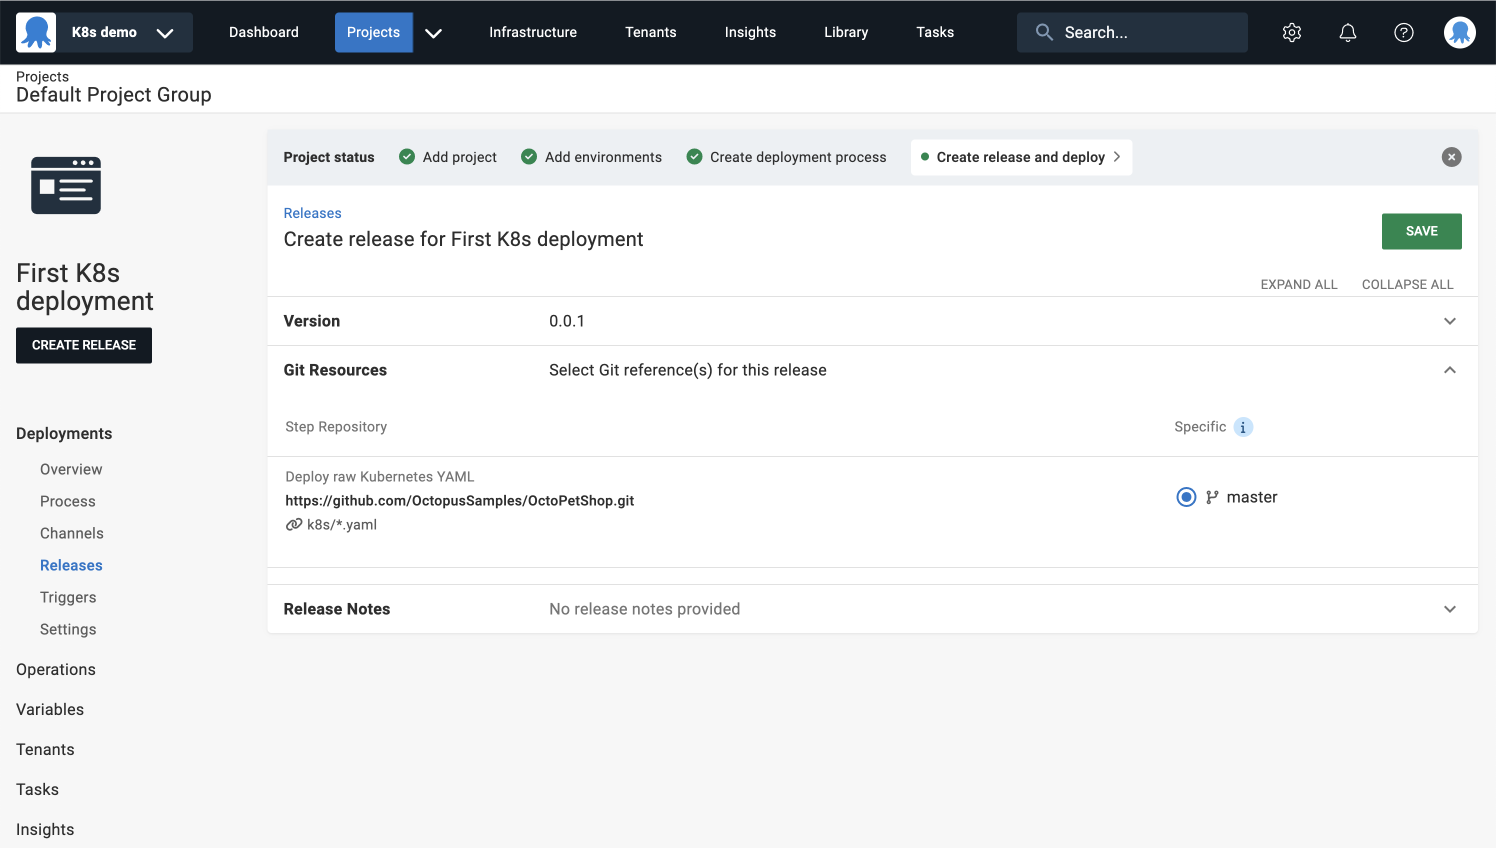
- Click SAVE.
Execute deployment
When you created this project, you selected the default lifecycle (Development ➜ Staging ➜ Production). Lifecycles determine which environments the project can be deployed to, and the promotion rules between those environments.
- Click DEPLOY TO DEVELOPMENT to deploy to the development environment associated with your cluster.
- Review the preview summary and when you’re ready, click DEPLOY.
Your first deployment may take slightly longer because your Docker image won’t be cached yet.
- Navigate to the KUBERNETES OBJECT STATUS tab to see the live status of your Kubernetes objects as the deployment progresses.
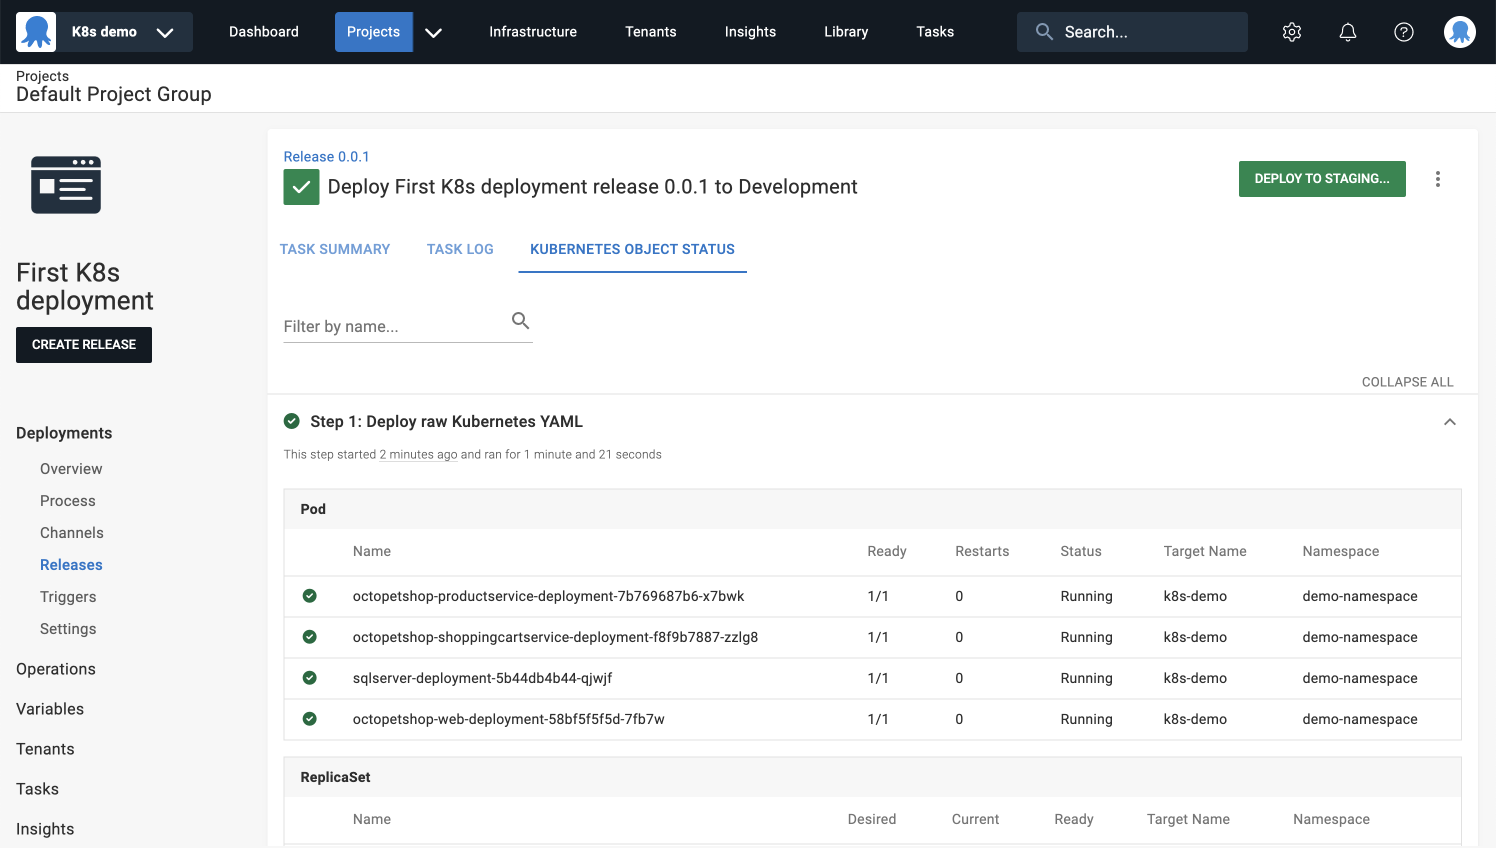
You’ve successfully completed your first deployment to Kubernetes! 🎉
As you continue to explore Octopus Deploy, consider diving deeper into powerful features like variables, joining our Slack community, or checking out our other tutorials to expand your knowledge.
More Kubernetes resources
- Deploy with the Kustomize step
- Deploy a Helm chart
- Using variables for Kubernetes without breaking YAML
Help us continuously improve
Please let us know if you have any feedback about this page.
Page updated on Thursday, April 18, 2024