Octopus allows you to define variables and scope them for use in different phases of your deployments. Variables allow you to have a consistent deployment process across your infrastructure without having to hard-code or manually update configuration settings that differ across environments, deployment targets, channels, or tenants.
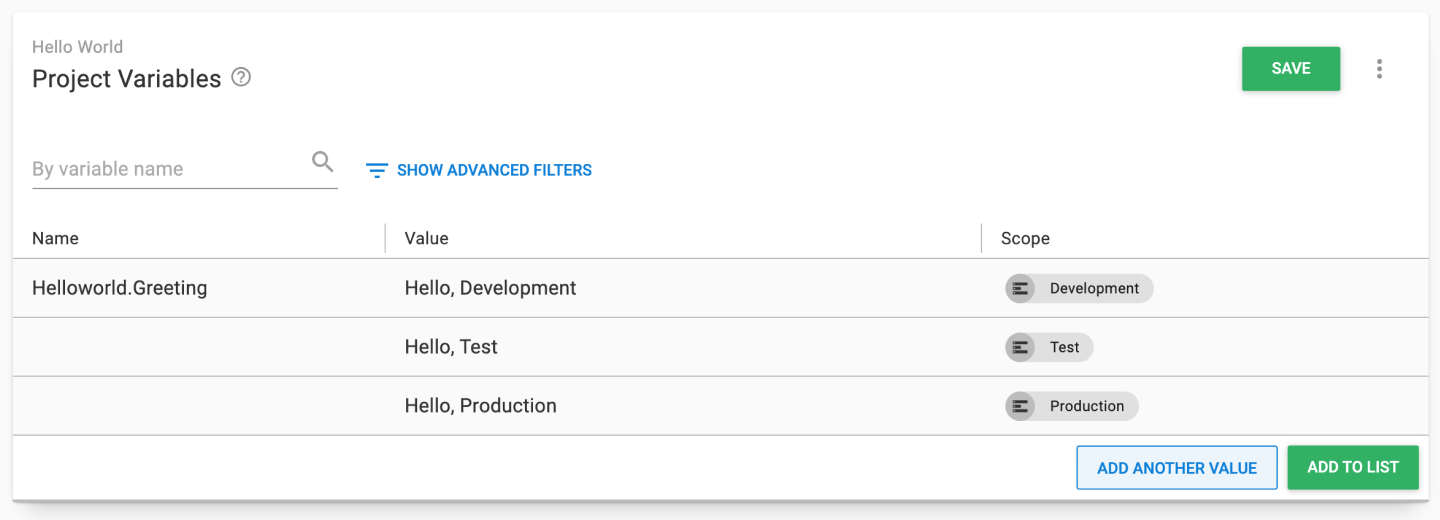
- From the Hello world project you created earlier, click Variables in the left menu.
- Enter Helloworld.Greeting into the variable name column on the first row of the table.
- Add Hello, Development into the value column.
- Click the Scope column and select the
Developmentenvironment. - Click ADD ANOTHER VALUE button.
- Add Hello, Test and scope it to the
Testenvironment. - Click ADD ANOTHER VALUE button.
- Add Hello, Production and scope it to the
Productionenvironment. - Click the SAVE button.
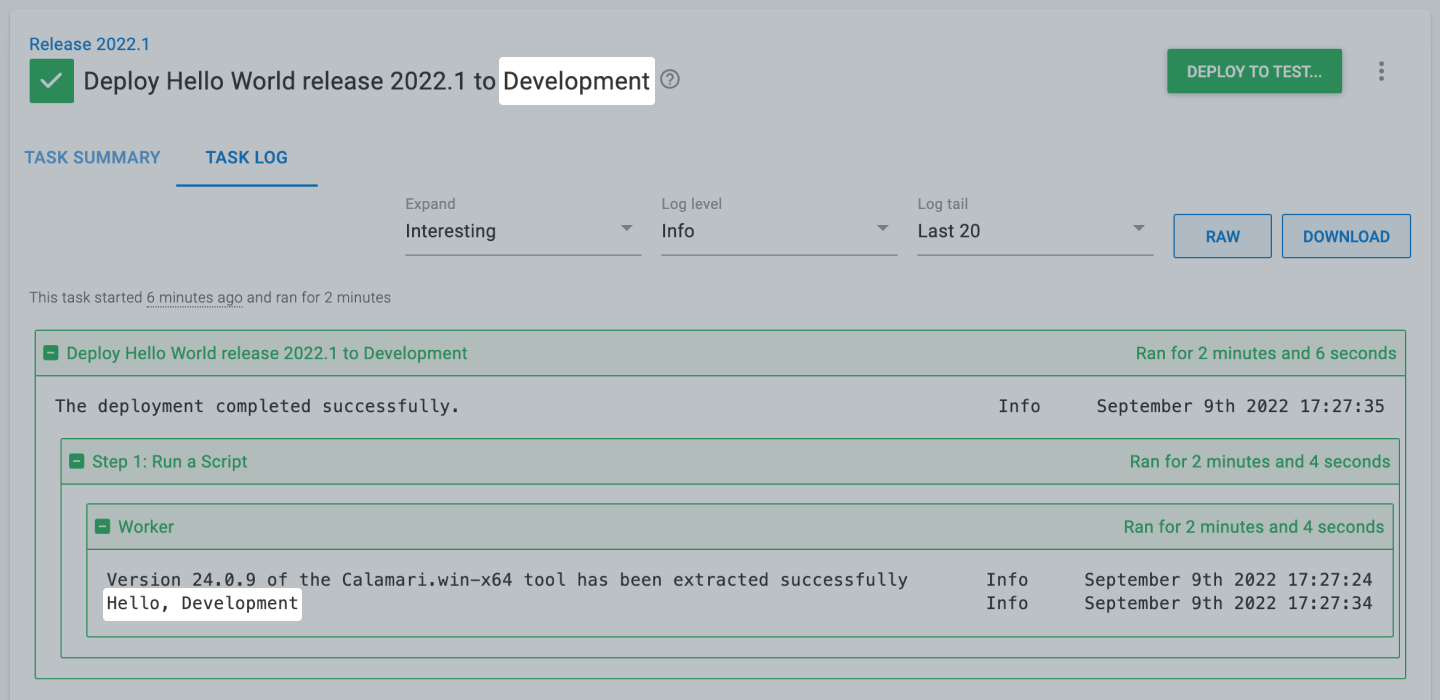
Steps in the deployment process can reference the variables.
- Click Process on the left menu.
- Select the previously created Run a Script step.
- Replace the inline source code script based on your selected language:
PowerShell
Write-Host $OctopusParameters["Helloworld.Greeting"]Bash
greeting=$(get_octopusvariable "Helloworld.Greeting")
echo $greeting
If you are using Octopus Cloud, Bash scripts require you to select the Hosted Ubuntu worker pool. The Default Worker Pool is running Windows and doesn’t have Bash installed.
- Click the SAVE button and create a new release.
A release snapshots everything about your project, including variables and the deployment process. You have to create a new release to see any changes.
As you promote through the environments, you will see the greeting change.
The next step will add an approval process using manual interventions.
Further Reading
For further reading on variables in Octopus Deploy please see:
Help us continuously improve
Please let us know if you have any feedback about this page.
Page updated on Sunday, January 1, 2023