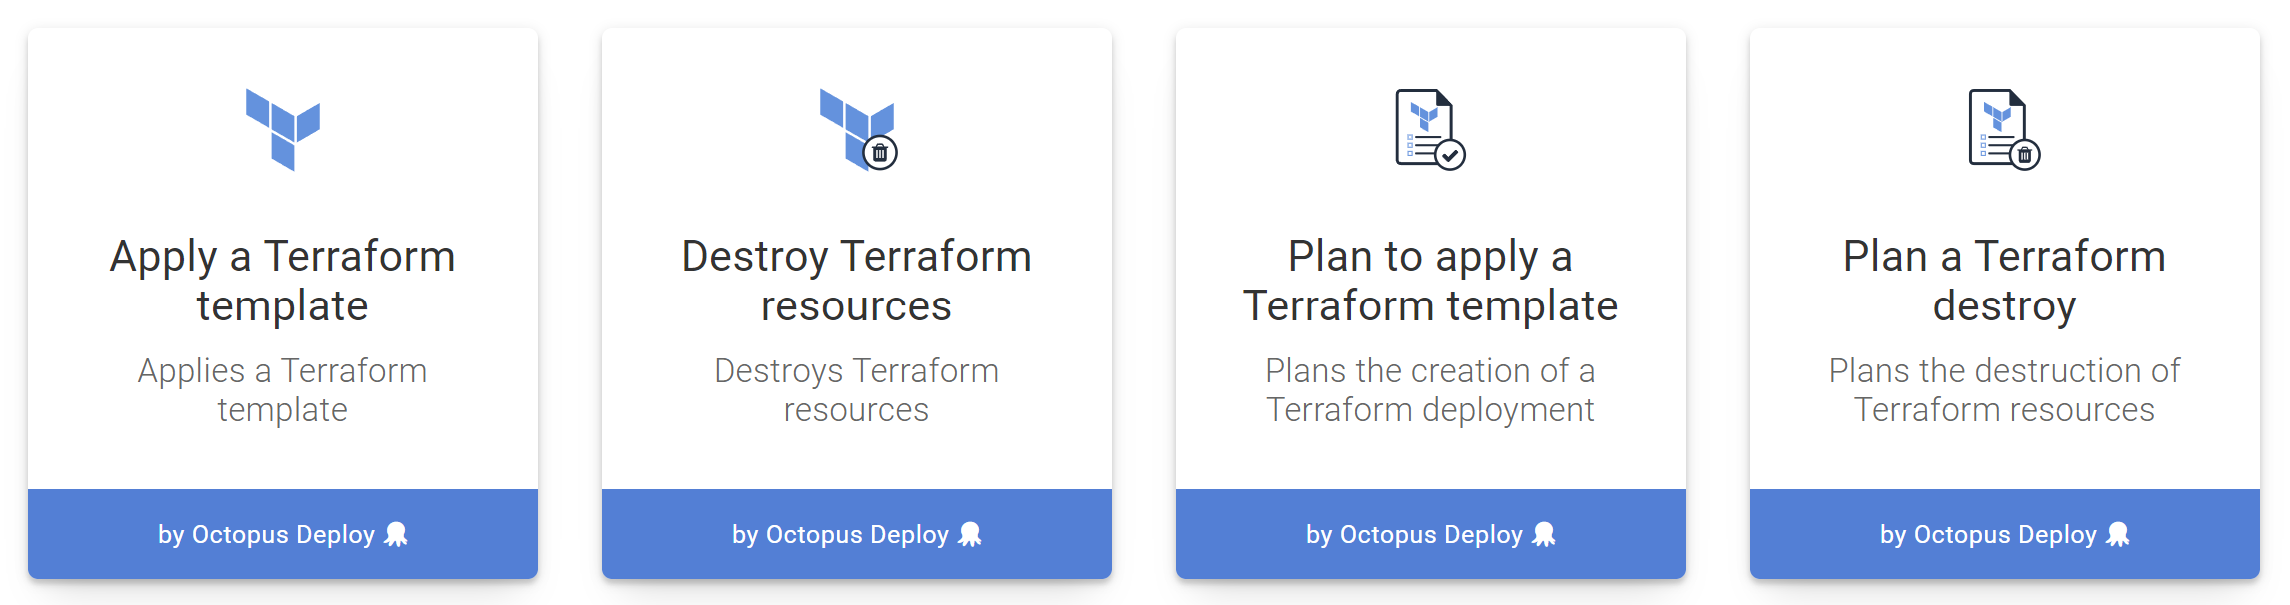
Octopus provides four built-in step templates for managing and interacting with your Terraform code:
Apply a Terraform templateDestroy Terraform resourcesPlan to apply a Terraform templatePlan a Terraform destroy
All four of the built-in Terraform steps provide common configuration points you can use to control how the steps execute your Terraform code.
While these are the options common to each step, there are additional ways to interact and extend these steps, specifically using Terraform plan outputs and Terraform output variables
Managed Accounts
You can optionally prepare the environment that Terraform runs in using the details defined in accounts managed by Octopus. If an account is selected then those credentials do not need to be included in the Terraform template.
Using credentials managed by Octopus is optional, and credentials defined in the Terraform template take precedence over any credentials defined in the step. You can learn more about creating managed cloud accounts using Octopus here.
Template section
The Terraform template can come from three sources:
- Directly entered source code
- Files in a package
- Files in a Git repository - New!
Source code
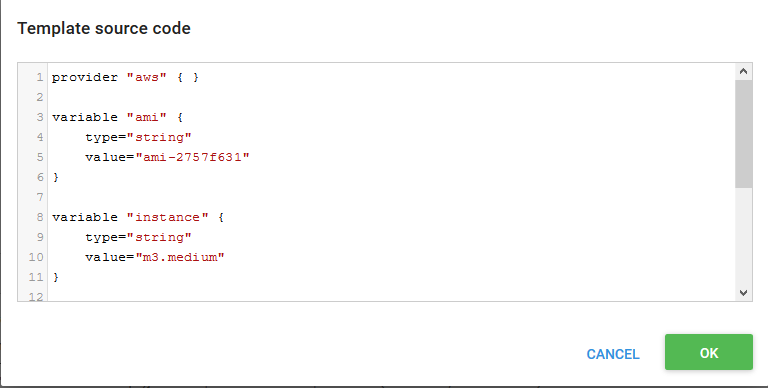
The first option is to paste the template directly into the step. This is done by selecting the Source code option, and clicking the ADD SOURCE CODE button.

This will present a dialog in which the Terraform template can be pasted, in either JSON or HCL.
Once the OK button is clicked, the input variables defined in the template will be shown under the Variables section.
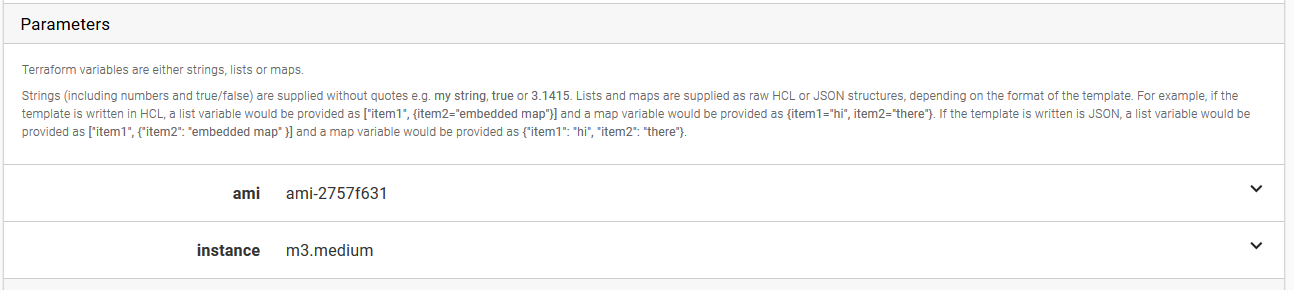
Terraform variables are either strings, lists or maps.
Strings (including numbers and true/false) are supplied without quotes. For example my string, true or 3.1415.
Lists and maps are supplied as raw HCL or JSON structures, depending on the format of the template. For example, if the template is written in HCL, a list variable would be provided as ["item1", {item2="embedded map"}] and a map variable would be provided as {item1="hi", item2="there"}. If the template is written is JSON, a list variable would be provided as ["item1", {"item2": "embedded map" }] and a map variable would be provided as {"item1": "hi", "item2": "there"}.
Package
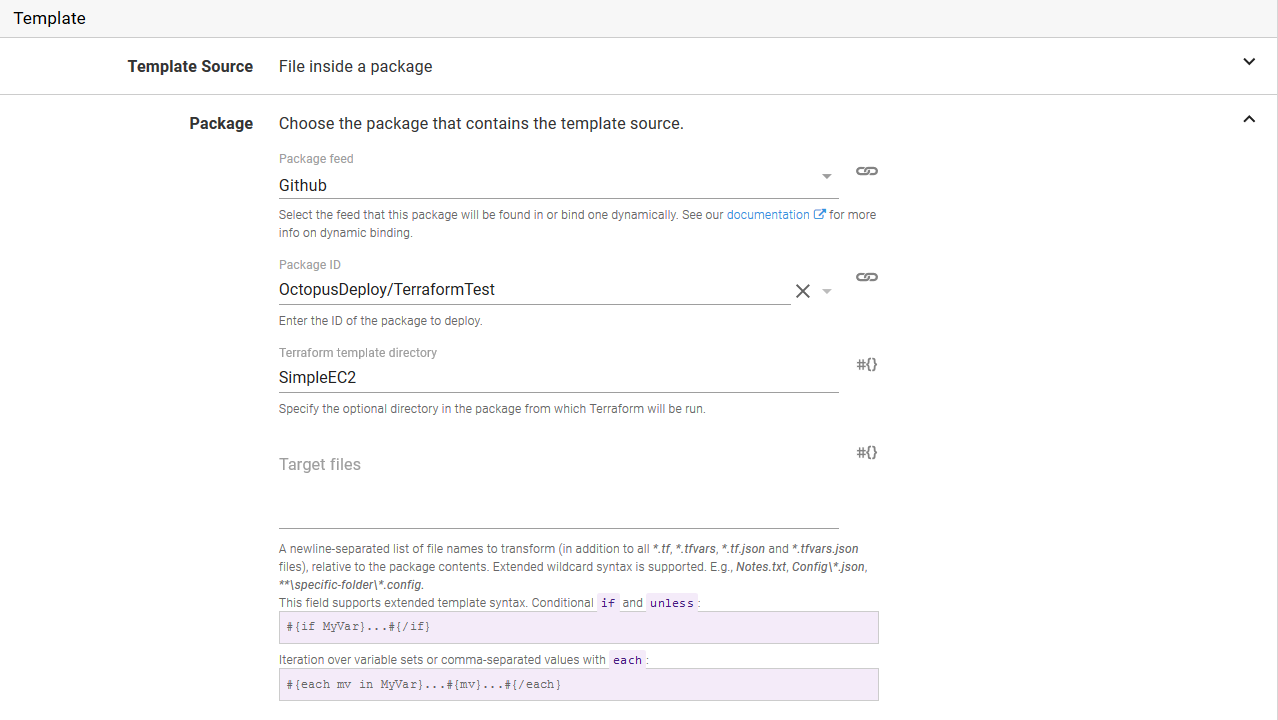
The second option is to use the files contained in a package. This is done by selecting the File inside a package option, and specifying the package.
The contents of the package will be extracted, and Terraform will automatically detect the files to use. See the Terraform documentation for more details on the file load order.
You can optionally run Terraform from a subdirectory in the package by specifying the path in the Terraform template directory field. The path must be relative (i.e. without a leading slash). If your package has the Terraform templates in the root folder, leave this field blank.
Given that Terraform templates and variable files are plain text, you may find it convenient to use the GitHub Repository Feed to provide the packages used by Terraform steps. Using GitHub releases means you do not have to manually create and upload a package, and can instead tag a release and download it directly from GitHub.
Git repository
Octopus version 2024.1 added support for Terraform files stored in Git repositories.
You can find more information about this feature in this blog post on using Git resources directly in deployments.
The third option is to use files container in a Git repository. This can streamline your deployment process by reducing the amount of steps required to get them into Octopus as you no longer need to package the files up and put them into a feed.
To configure Terraform steps to use a Git repository, select the Git Repository option as your Template Source.
Database projects
If you are storing your project configuration directly in Octopus (i.e. not in a Git repository using the Configuration as code feature), you can source your files from a Git repository by entering the details of the repository directly on the step, including:
- URL
- Credentials (either anonymous or selecting a Git credential from the Library)
When creating a Release, you choose the tip of a branch for your files. The commit hash for this branch is saved to the Release. This means redeploying that release will only ever use that specific commit and not the new tip of the branch.
Version-controlled projects
If you are storing your project configuration in a Git repository using the Configuration as code feature, in addition to the option above, you can source your files from the same Git repository as your deployment process by selecting Project as the Git repository source. When creating a Release using this option, the commit hash used for your deployment process will also be used to source the files.
Variable replacements
Variable replacement is performed before the template is applied or destroyed when defined in either an inline script or a package.
When deploying a template from a package, all *.tf, *.tfvar, *.tf.json and *.tfvar.json files will have variable substitution applied to them. You can also have variable substitution applied to additional files by defining the file names in the Target files field.
For example, if you were deploying from a package and your template file looked like this:
provider "aws" { }

resource "aws_instance" "example" {
  ami           = "#{AMI}"
  instance_type = "m3.medium"
  tags {
    Name = "My EC2 Instance"
  }
}
Then the value from the project variable AMI would be substituted for the marker #{AMI}.
When applying an inline template, the variable fields can also include replacement markers. For example, if a map variable for a HCL template was defined as {"key" = "value", #{MapValues}} and the Octopus project had a variable called MapValues defined as "key2" = "value2", then the final variable would resolve to {"key" = "value", "key2" = "value2"}.
See the variable substitution documentation for more information.
Additional variable files
The Additional variable files option contains a new-line separated list of variable files to use with the deployment. All files called terraform.tfvars, terraform.tfvars.json, *.auto.tfvars and *.auto.tfvars.json are automatically loaded by Terraform, and do not need to be listed here. However you may want to reference environment specific variable files by referencing them with files names built around variable substitution such as #{Octopus.Environment.Name}.tfvars.
Each line entered into this field will be passed to Terraform as -var-file '<filename>'.
Help us continuously improve
Please let us know if you have any feedback about this page.
Page updated on Sunday, January 1, 2023